
Table of Contents
INTRODUCTION
This tutorial installs a grub4dos boot menu to your systems hard disk.
When you turn on your computer, it will display a small menu and there will then be a 5 second timeout before it boots to Windows as normal.
However, if you select the Linux ISOs menu item, it will then list all the linux ISO files that you have previously placed in the C:\Linux_ISO folder on your hard disk.
You can then select any one of these ISO files and boot from it as if it were a ‘LiveCD’.
No menu editing or other changes are required – just drop all your linux LiveCD ISO files into the C:\Linux_ISO folder, reboot and run them!
This works with 99% of linux ISOs (but not quite all!).
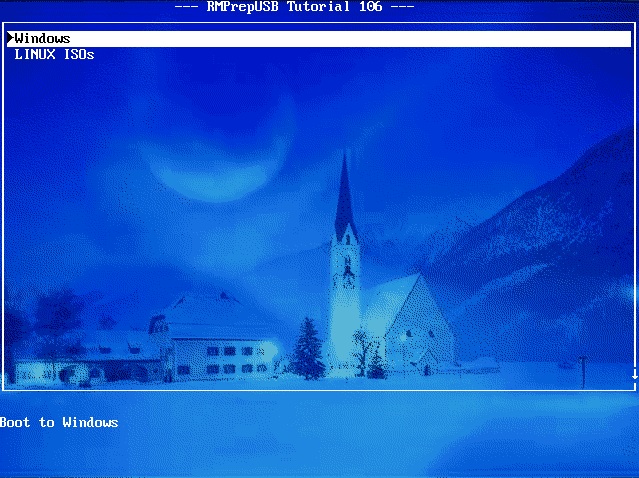
Fig. 1 The first menu – after 5 seconds it will boot to Windows as usual
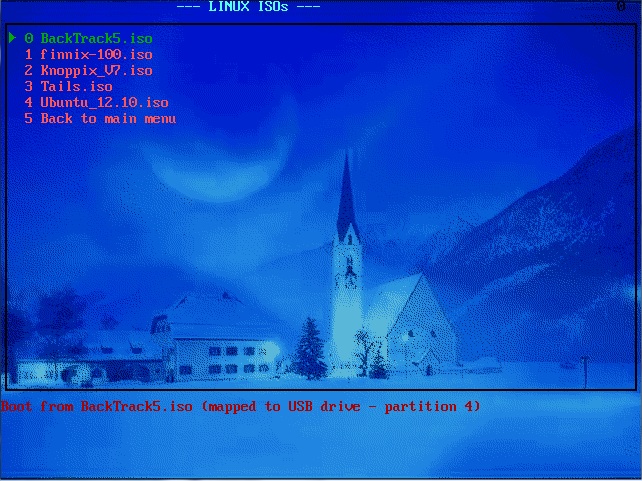
Fig. 2 If the Linux ISO menu is chosen, your ISO files will be listed
PRE-REQUISITES
1. This tutorial assumes you do not already have grub4dos installed on your hard disk and that your Windows disk is does not contain GPT partitions.
2. This tutorial assumes that you have three or less primary partitions on your hard disk – it will refuse to work if you have four primary partitions on your hard disk.
2.1 To check this, run RMPrepUSB, press Ctrl+F5 for ALLDRIVES mode, so that your hard disk is listed
2.2 Click on the Drive Info button in RMPrepUSB and enter 0 for the start sector
2.3 Now study the listing in Notepad (near the bottom) and check that PARTITION 4 is unused. If Partition 4 contains a Primary or Extended partition entry, you cannot use this tutorial.
WARNING: Only proceed if you are experienced with disk partitions and understand how this works! You could end up with a non-bootable system!
METHOD
1. Check the Pre-requisites above before you begin. Note that this procedure will install grub4dos to your hard disk and there is a small possibility that your system will not be able to boot afterwards if you have a non-standard Windows system. You have been warned. For most standard XP, Vista, 7 and 8 systems, there should not be a problem however (but the risk is yours – you have been pre-warned!)
2. Download the linuxhdd.zip file, unpack it and copy it to your C:\ drive (to the root, not a subfolder). Check you now have:
- C:\menu.lst
- C:\grub folder
- C:\Linux_ISO folder
3. Run RMPrepUSB – press Ctrl+F5 for all drives mode. Select the hard disk that drive C: is located on (if you only have one hard disk then the choice is easy!). Now install grub4dos as follows:
Click on Install grub4dos – answer Yes to the ‘install to MBR’ question and hit Enter and click on ‘OK‘ to copy the grldr file over.
Check that the file C:\grldr is present when this has completed.
Do not proceed unless the C:\grldr and C:\menu.lst files are present.
4. Finally, we will need a linux LiveCD iso file to test. Download one from ‘tinternet and copy the file to the C:\Linux_ISO folder. You can copy as many ISO files as you like to this folder. Usually only linux and DOS ISO files will work, but you can try any bootable ISO to see if it will work.
TESTING
1. Restart Windows – you should see the new grub4dos menu (Fig. 1) – wait 5 seconds (or hit the Enter key) and your system should boot as normal.
2. Restart Windows – when the menu appears choose the 2nd Linux ISOs option. After a short while, you should see all the ISO files in the C:\Linux_ISO folder listed (Fig. 2). Use the cursor up/down arrows to select an ISO and press Enter to boot from the ISO as a CD.
If you wish, you can rename the .iso files, but avoid spaces in the filenames as these can look ugly when listed, use _ instead of a space – e.g. Puppy_Linux_Special_Build_1.3.iso – the file extension must remain as .iso however.
Note that ISO booting in this way is not persistent so you cannot change or corrupt the ISO file when you boot from it. However, if you access files on your hard disk through the booted linux OS, that will permanently change the files on the hard disk. Equally, if you try to ‘install’ linux to the hard disk, it will also permanently modify the hard disk. This is the same behaviour as if you had booted from a LiveCD.
TROUBLESHOOTING
- If you get an ‘Error 60: File not contiguous‘ message, reboot to Windows and type SHIFT+F2 to launch WinContig from RMPrepUSB, hit CTRL+D in WinContig and select the Linux_ISO folder. If C: is also listed, select C: and click on the red cross to delete it from the list. Now click on Defragment to make all files in the folder contiguous.
- If your system no longer boots to Windows, boot to the grub4dos menu and press C before the 5 second timeout. You are now in the grub4dos command shell. You can now try various diagnostic commands as described here.
- If you see an WARNING: PTN TABLE 4 IS ALREADY IN USE! message, it means you cannot use this method on your system as it requires a spare 4th partition table entry.
- If you do manage to boot to Windows again (either from the hard disk or a USB disk) and want to restore the original boot code and remove the menu, run RMPrepUSB, select the same hard drive as before and hit CTRL+B and follow the prompts.
MODIFYING THE MENU
The first menu is contained in the C:\menu.lst file. You can change the background image as follows:
Add a bitmap (.bmp) file to the C:\grub folder. This should be exactly a standard graphics display size (640×480, 800×600, 1024×768).
In the C:\menu.lst file replace the line splashimage /grub/BlueLight.xpm.gz with
splashimage /grub/mybitmap.bmp
For more ideas, e.g. changing the text colours, forcing a graphics mode, etc. see the grub4dos tutorial here.
If you want to place you ISO files on a different partition, change MFOLDER in \menu.lst – e.g. if your ISOs are in a folder called ISO on the 2nd partition of your first hard drive use
set MFOLDER=(hd0,1)/ISO
If you want to use ISO files that are on a different disk, e.g. (hd1,3) then you will also need to modify the batch file as well as the MFOLDER variable
e.g. If you are sure the hd1 2nd drive has no 4th partition then change the following line in the \grub\AUTOLINUXMENU.bat file
…..
- echo ADDING %DIR%/%1
- echo title %1 %hlp% >> (md)0x3000+0x50
- echo partnew (hd0,3) 0x00 %DIR%/%1 >> (md)0x3000+0x50
- echo map %DIR%/%1 (0xff) >> (md)0x3000+0x50
change to…
- echo ADDING %DIR%/%1
- echo title %1 %hlp% >> (md)0x3000+0x50
- echo partnew (hd1,3) 0x00 %DIR%/%1 >> (md)0x3000+0x50
- echo map %DIR%/%1 (0xff) >> (md)0x3000+0x50
WARNING: the partnew command (shown in red) will erase a Primary partition entry without warning – be sure to specify the correct partition!
Note that you can only specify Primary partitions 0, 1, 2 or 3 – partnew does not work with Logical partitions.
Also note that Logical partitions use an Extended partition table entry which occupies one of the 4 Primary partition table entries.
Tip: Use RMPrepUSB – Drive Info – 0 to inspect the four Primary partition table entries of your hard disk (use Ctrl+F5 to allow RMPrepUSB to list all hard drives). Most partition utilities do not show the Extended partition entry!
- Partition 1 SIZE=1007727MiB Type: 07 NTFS
- START POS = CYL:0 HD:32 SEC:33 END POS = CYL:1023 HD:254 SEC:63
- START (LBA) = 2,048 (00000800) SIZE (LBA) = 2,063,824,896 (7B037800) [End=2,063,826,943]
- Partition 2 SIZE=899999MiB Type: 07 NTFS
- START POS = CYL:1023 HD:254 SEC:63 END POS = CYL:1023 HD:254 SEC:63
- START (LBA) = 2,063,826,944 (7B038000) SIZE (LBA) = 1,843,197,952 (6DDCF800) [End=3,907,024,895]
- Partition 3 SIZE=0MiB Type: 00
- START POS = CYL:0 HD:0 SEC:0 END POS = CYL:0 HD:0 SEC:0
- START (LBA) = 0 (00000000) SIZE (LBA) = 0 (00000000)
- Partition 4 SIZE=0MiB Type: 00
- START POS = CYL:0 HD:0 SEC:0 END POS = CYL:0 HD:0 SEC:0
- START (LBA) = 0 (00000000) SIZE (LBA) = 0 (00000000)
This shows 2 partition table entries are unused.
Click here (OneDrive folder) if you cannot find any file mentioned in the articles on this site or Contact Me.