
Table of Contents
You can make QEMU, VMware Server or Oracle VirtualBox boot from the host USB drive. This is an easy way to test if your bootable USB drive is really bootable without having to reboot your Windows system and boot it from the USB drive instead. Note however that if it boots under a VM it does not guarantee that it will boot from every system for real!
Oracle VM Virtual Box can boot from a USB drive with full write access using DavidB’s Virtual Machine USB Boot application (see below).
I highly recommend using VBox+VMUB for USB booting. Although it is possible to boot from USB without using VMUB, you will find that some things don’t work correctly (e.g. writes to files under the BIOS/grub2/grub4dos/DOS, etc.) and in some cases don’t even boot successfully.
The VMUB utility dismounts the USB drive before VBox runs and so allows VBox full unlocked access to the USB drive.
The version of QEMU available in RMPrepUSB is much slower and is 32-bit only but can be used for testing grub4dos menus and will be almost as successful as VBox (just a lot slower!).
RMPrepUSB v2.1.707 and later versions have two QEMU ‘boot from USB drive’ options:
- F11 – boot from USB drive but now with full read/write access (but the host Windows OS will not be able to access the drive whilst QEMU is running).
- Ctrl+Shift+F11 – boot from USB drive in ‘snapshot’ mode. This used to be the default action in previous older versions of RMPrepUSB (used to be F11). This mode is still useful if you want to be able to modify files on the USB drive whilst QEMU is running because the USB drive is not dismounted. This allows you to make simple changes (e.g. colour or menu position) and reload the menu whilst still running in the QEMu session and so this mode is still useful in some cases.
I strongly recommend using Oracle VBox with DavidB’s Virtual Machine USB Boot utility for the best results.
Boot from a USB drive using Oracle Virtual Box
I use VBox+VMUB every day. It can MBR and UEFI-boot from a USB drive and is very easy to use!
Enabling full rd/wr access with VMUB (highly recommended!)
The problem:
If you use a .vmdk file for the USB drive within the VM, Windows will have a ‘lock’ on the drive volume, so that the VM is not able to have write access to the USB drive volume.
It can write to sectors outside of the partition (e.g. MBR), but not files inside the partition (e.g. files).
In this case, the VM will ‘snapshot’ the drive so that any writes you make to the locked portion of the USB drive (when running under the VM) will go to a snapshot version of the USB drive and will not physically write to the sectors on the USB disk.
For instance, you can boot from a USB drive inside a VM to grub4dos, change the contents of a file using grub4dos and then quit the VM, but if you examine the file on the USB drive afterwards, you will find it will not have been changed!
This can cause problems when testing/booting some OS’s or grub4dos, etc.
The solution
DavidB has provided a great utility which allows a USB drive to be run under Oracle VM VirtualBox and the writes to USB will work correctly without ‘snapshotting’ and so be permanent.
This also solves the problem of some payloads not booting or crashing inside VBox. By using VMUB to give the VM full rd/wr access to the USB drive, booting under VBox becomes much more reliable!
Latest VMUB v1.72 Download from GitHub. Also has a VBox portable version too. (v1.72 is for VBox v5 and is NOT compatible with VBox v6)
DO NOT USE VBOX V6!!! ONLY USE VBOX V5 with VUMB v1.72 (VBOX v5 also supports UEFI32) Workaround to run an existing VM after upgrading to VBox v6 if you see a ‘–startvm error’): Use VMUB – Options – VirtualBox – Exe Path = C:\Program Files\Oracle\VirtualBox\VirtualBoxVM.exe – change back to VirtualBox.exe when setting up VM for first time though.
Here is what to do;
1. Download the latest version of the GUI utility and run the setup program to install it (or use the portable version). If the site is down, see bottom of this page for a download.
IMPORTANT: Right-click on the VBox Desktop icon or shortcut if you have made one, and tick the Advanced – Run as Administrator box.
Note: If you are using the portable version – you obviously cannot copy it to the same USB drive that you are trying to boot from! I recommend using the installable version to start with.
2. Run Oracle VBox Manager as Administrator and make a new VM which leaves an empty space for the FIRST hard disk (this will be used by the USB drive).
If booting to grub4dos and then to another OS, I suggest setting the System type to Linux\Ubuntu 64-bit. If you use Windows 64-bit this can cause compatibility issues with some grub4dos\Windows\FiraDisk\memory features.
You can add more virtual hard disks (VHDs) or CD/DVD drives to the VM but you must leave the first hard disk ‘slot’ free.
e.g. If using an IDE VHD, leave the Primary Master IDE hard disk slot free.
If using a SATA VHD, leave SATA Port 0 free and attach the VHD to SATA Port 1.
Tip: If you have not used VBOX before, the first VM you create should contain a virtual hard disk (e.g. .vdi) so that VBOX will create a folder – otherwise VMUB will report an error.
Note: Do NOT add the USB boot drive into the Settings – USB form of the VBox settings, or else it will not boot from the USB drive. Leave the USB settings empty (or point it at a different USB drive).
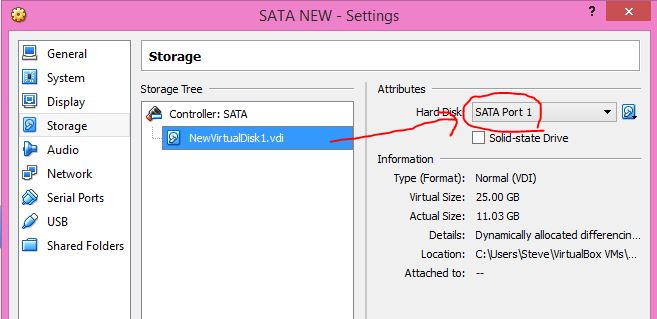
SATA Port 0 is unused to allow for the USB drive to be added by VMUB to SATA Port 0
Make sure you do NOT add the USB drive into the USB settings!
3. Run the Virtual Machine USB Boot utility (Admin access required – Run as Administrator) and use the Add icon to add a new entry – use any name you like for each entry and then attach a USB drive to your system and add it in to the ‘Drive to Add’ section.
IMPORTANT: Right-click on the VMUB Desktop icon or shortcut if you have made one, and tick the Advanced – Run as Administrator box.
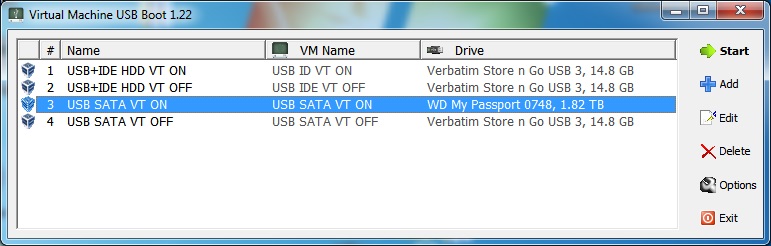
This is the utility set up for four different VMs
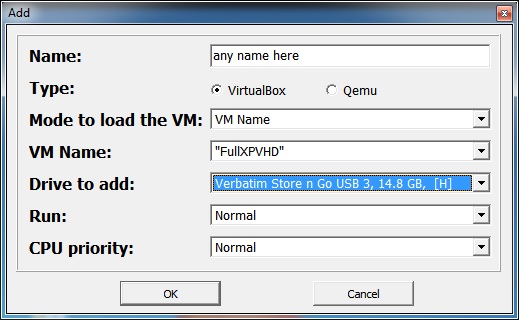
This is the Add/Edit form. Choose a suitable name, the VM you want and
the USB drive you want to boot from.
4. To start the VM click on Start.
In this way you can make the free Oracle VM VirtualBox boot from USB with writes just like a real drive.
Tip: If you hold down the CTRL key before clicking on Start, VMUB will not dismount and lock the USB drive. This is useful if you want to test out a grub4dos menu system for instance as you can directly edit a file on the USB drive while it is running VBox and then reset the VM to see the affect of your changes. I suggest you do not try to boot an OS from the USB drive in this way however as it may not work unless the USB is fully dismounted and also any writes made under grub4dos may not be persistent.
Note that when you boot from the USB drive, the first HDD will be the USB drive (hd0 or \dev\sda) and the 2nd HDD will be your virtual HDD (if you have set one up). So when booting to linux or Windows, the drive lettering may not be the same as when you boot from a real system (e.g. under linux, the USB drive will be sda when booting under the VM, but sdb when booting on a real system).
If you want to boot to a different USB drive, select the VM from the list and then click the Edit icon – then change the USB drive to any drive that is currently attached.
You can have the VBox Manager application running at the same time if you wish.
5. Quit VBox.
Always close the session using ‘Power off the machine‘
WARNING: by default VBox will choose ‘save the machine state’!

Tip: VMUB can also run QEMU, just set up the path to the QEMU exe file, e.g. C:\Program Files (x86)\RMPrepUSB\QEMU\qemu.exe as below:
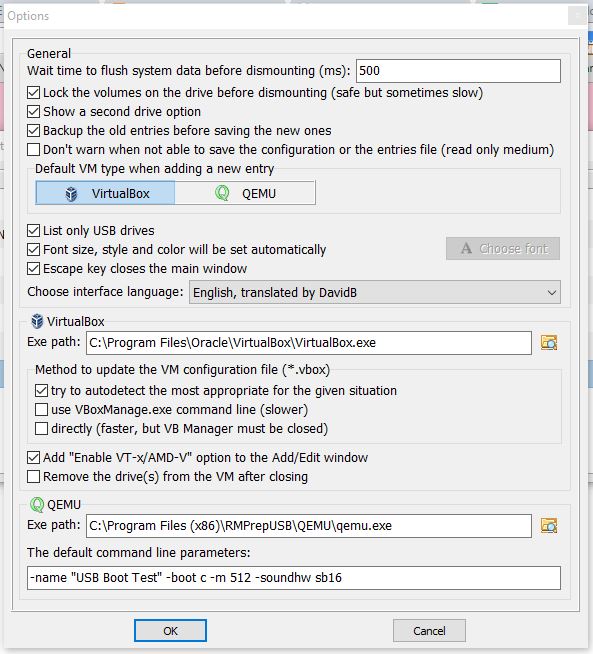
The latest QEMU Windows binaries can be obtained from here.
VBox is way faster and better than QEMU however!
Tips when using Oracle VBox
- Make sure you run both VBox and VMUB with Admin rights or it won’t work under Win7/8/10 normal user accounts!
- If you are booting XP type OS’s, you may be more successful by disabling VT-x /AMD-V and PAE/NX. If using Vista and later OS’s enable VT-x. Use DavidB’s USB VM app for XP type ISOs – this seems more successful than using the Oracle VBox Manager because drive writes will work correctly when using Start_VM.exe.
- If your CPU supports it, enabling VT-x /AMD-V and PAE/NX will result in much faster emulation. Also use 2 or more processors if available.
- If only 32-bit VMs can be configured, enable VT-x and Intel Virtualisation in the BIOS. – see video here.
- If you have enabled Hyper-V then VBox use of VT-x will be blocked. You must uninstall the Hyper-V feature (CPanel – Programs and Features – Features – Hyper-V).
- VT-x /AMD-V and PAE/NX support may need to be enabled on some BIOSes.
- If you find that you sometimes get errors when trying to run a VM with VT-x but previously you did not get errors – switch off your system (not reboot but actually power off). Then switch on again. Also try this if your VM seems to be running much slower than normal even with VT-x enabled.
- Some versions of linux or Windows may not boot successfully unless you choose the correct ‘Type’ and ‘Version’ in VBox for the Virtual Machine. e.g. a PMagic linux-based ISO will not boot correctly if the VM is set to Type=Windows Version=Win8.
- VBox does not support Win7 x64 booting in UEFI mode – other versions of Windows are OK.
- Using just the VBox Manager is useful if you just want to test out menus because you can still write and update any file on the USB drive whilst the VM is still running – this is very useful for updating menu files, etc. as you don’t need to shutdown the VM every time you need to edit a file.
- If you use DavidB’s utility to run the VM, then the USB drive will be dismounted and you will not be able to access the USB drive or edit any files on the USB drive until you close the VM.
- Status: 0xc0000225 Info: An unexpected error has occurred
- or
- Windows failed to start
- This is because in Settings – System – “enable IO APIC” is checkbox is not selected for Win7 64-bit.
- When booting OS X payloads, use Mac OS X, lots of memory, VT-x+PAE/NX, PCnet-PCI (NAT), Windows Direct Sound+AC97.
- If using a Haswell CPU and you get ‘CPU is not recognised’ or “Missing Bluetooth Controller Transport” hang (it can take a while – wait!), use command prompt –
- VBoxManage.exe modifyvm SATA –cpuidset 00000001 000306a9 00020800 80000201 178bfbff
- to change CPU type for the VM named SATA (change to your VM name) – tip: to debug or if hanging when mounting volumes, use -v -x OS X switches before pressing ENTER to run the installer.
- Avoid using ‘Windows X – 64-bit’ as VM OS Type – it can cause compatibility issues with some grub4dos\WinPE\Firadisk drivers, etc.
Problems installing XP or running BartPE from USB under Oracle VBox?
If Oracle reports an error just at the very start of XP text-mode setup then you can fix it by turning off VT-x/AMD-V in the Acceleration – System settings.
Once text-mode completes and the VM reboots, you can speed up the install by re-enabling VT-x for the GUI-mode setup phase.
I set up two VMs, one with VT on and one with VT off. I use VT-off for the first text-mode install of XP and booting BartPE, etc. and the use VT-ON for the 2nd GUI-mode install stage of XP and most others OS’s.
Tip: For network access if booting to XP, instead of NAT, use Network – Attached to: Bridged Adapter, Advanced – PCnet-PCII – Allow All – Cable Connected.
Windows UEFI booting
In VirtualBox – to UEFI boot, tick the System – Motherboard – Extended Features – Enable EFI (Special OSes only) checkbox.
Set the General – Basic – OS Version to be either 64-bit or 32-bit (this selects a 64-bit or 32-bit UEFI system)
Note: set the graphics display memory to 65MB or more. If you set 64MB or less, then Windows may not boot correctly (black screen shortly after initial boot logo).
Win 7 / Vista UEFI booting not yet supported (Win8.1/10 is OK).
Running VBox in ‘Read-only’ mode
These instructions will allow you to boot from the USB drive as read-only – therefore some things (e.g. writes to files when running inside the VM) may not work if you boot a USB drive using this technique!
For instance, if you boot to grub4dos and it uses the ‘default’ command to write to a file on the USB drive, the file writes will have been ‘snapshotted’ by the VM and the next time you boot, the file will not have been changed! Hence the ‘default’ command will not appear to work.
The advantage of using this arrangement is that you can run the VM and still be able to modify files on the USB drive using the host OS – for instance, you can boot from a USB drive using VBox, then edit some files from the Windows host system without needing to close the VM first, and then reboot the VM.
The easiest way to do this is use VMUB to first set up the Virtual Machine, but then run the VM from the VBox Manager application without using VMUB.
However you can also use the MakeUSBvmdk.cmd script…
1. Download and extract the file MakeUSBvmdk.cmd and place it on your Desktop (or anywhere convenient)
2. Close VM VirtualBox now.
3. Right-click on the file and run as ADMINISTRATOR and enter in the USB drive number (as listed in RMPrepUSB) – the new vmdk file will be created for you and placed in the correct folder for Oracle VirtualBox to use.
4. Run VM Virtual Box as ADMINISTRATOR (right-click – Run as Administrator)
5. Set the Master IDE contents to the new USBPortX.vmdk file in Oracle Manager (see screenshot – click on the disk icon)
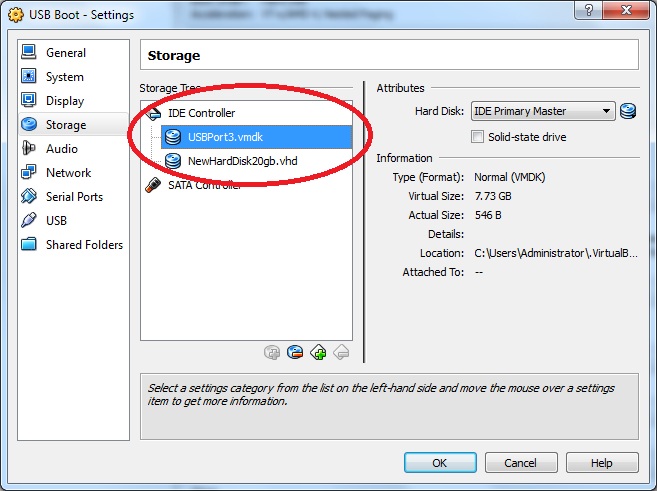
Click on the stacked-disk icon (to the right of IDE Primary Master) to select the new vmdk file.
The USB can now be booted from but any writes to the USB drive volume (sectors outside the volume can be written to) will not have any affect as the volume will be locked by Windows and thus writes will be prevented (they will be ‘snapshotted’ and so the USB drive sectors will not be physically written to).
The USB drive must always be the same drive number – if you have two USB drives connected and your VM uses USBPort1.vmdk, then check with RMPrepUSB which USB drive is no 1 – you may need to remove and re-attach USB drives in a different order, to get the correct drive as the correct number.
Re-Running MakeUSBvmdk.cmd
If you buy a larger USB drive or re-make a new USBPortx.vmdk using a different drive, you will need to re-attach the new USBPortx.vmdk file (otherwise VirtualBox Manager will complain about the registry entry being wrong!) as follows:
1. In File – Virtual Media Manager – Remove the old USBPortx.vmdk file (you may need to expand it and Release and Remove any children first)
2. Insert your largest USB device into a USB port and run RMPrepUSB to find out what device number it is
3. Repeat the steps above.
If you require instructions on how to add a vmdk to a new VM see here for a tutorial or watch the YouTube video below.
Boot from a USB drive using VMWare
These instructions are from a post by Starla on http://www.easy2boot.com/forum/
There is a YouTube video here.
Anyway I’ve found a way to get both BIOS and UEFI USB 3.0 boot support, read *and* write on VMWareWks11 by applying the same approach as the Virtual Box USB Boot utility VMUB by DavidB does for VBox.
1. Ensure that VMware USB Arbitration service is running. Sidenote: this is the only “VMware” service that needs to be running unless you require network access from your installed guest OSes or being able to run your VMs from a remote computer (o_0).
2. Connect your E2B drive to USB 3.0 port on host computer.
3. Start VMware, select your VM of choice and open its settings window.
3. Under Hardware tab, click Add and select New HDD. Follow the wizard. The key choices are using “SCSI type” (using “SATA type” throws an error at the end of the process, and I’ve not tested “IDE type”) *and* using a Physical disk instead of creating a virtual drive. You need to select the “physicaldrive” from a list. You can find the one that belongs to your E2B drive by running CMD->diskpart->list disk. Finally you will be asked to create a virtual disk file for it (.vmdk file). Create it wherever you want, it will stay at 1 kB in size, so don’t worry.
4. After finishing the Add HDD wizard, a new SCSI HDD will be listed on your VM hardware. Select it and click on Advanced button on the right. Ensure the disk is “Independent” and changes are “applied immediately”. Not sure if this step is required, but I think this will be the fastest and more straightforward way to go.
5. Depending on your needs, enable or disable the EFI firmware for your VM.
6. Power on your VM *to the firmware* (important). Be sure your boot priority is set to the E2B “SCSI HDD”. After that initial config you can simply power on the VM.
That’s it. Feels even faster than VBox. The downside is VMware is a lot more system invasive than VBox. I had to spend some time disabling uneeded services, network connections and network protocols after installation.
Use Plop! with VMware Server
Note: This method uses Plop which uses a read-only USB driver. It is not suitable for Easy2Boot (see above or use VBox+VMUB instead)!
VMware is faster than QEMU.
On your Windows system, test your bootable USB Flash Memory Drive (UFD) within Windows by booting it via a Virtual Machine using VMware Server as follows:
1. Download VMware server (or Oracle VirtualBox) and install it onto your Windows PC
2. Click on the Desktop shortcut which was created during the VMware Server installation (VMware Server Home Page icon):

You may get a security warning – if so just ignore it and click ‘Continue to this website’.
Note: The Google Chrome Browser is not compatible and you will get this error – try Internet Explorer instead!
3. Enter your Windows logon credentials when prompted (i.e. same username and password that you normally use to log in to your Windows Desktop – e.g. myname + mypwd)
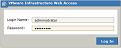
Use your Windows credentials to log in (obvious isn’t it!)
3. Download PLOP Boot Manager ZIP file – e.g. plpbt-5.0.10.zip
4. Extract the plpbt.iso file from the ZIP file and place it in your VMware Virtual Machine folder (in my case C:\Virtual Machines)
5. Now create a new virtual machine called USB BOOT (choose OS, Memory size, CPU numbers, size of new virtual disk, add a network adapter, add a DVD – Use an ISO image – browse to plpbt.iso, add floppy if required, add USB Controller, Finish). If you already have an virtual machine configured, select it and in the Summary tab click on the CD/DVD drive icon and choose Edit and then set Host Media and ISO image and Browse to the plpbt.iso file. The iso file must be present in the same folder as your virtual machine folder or you will not be able to select it in the VMware ISO browser applet.

Fig. 1 Ensure the plpbt.iso image is selected for the CD/DVD drive.
6. OPTIONAL: Now click on the Configure VM Command and highlight the Advanced tab – tick the Disable Acceleration radio button. If you do not do this, the PLOP manager may fail to boot and hang at the ‘LOADING UHCI’ or ‘LOADING EHCI’ progress text.
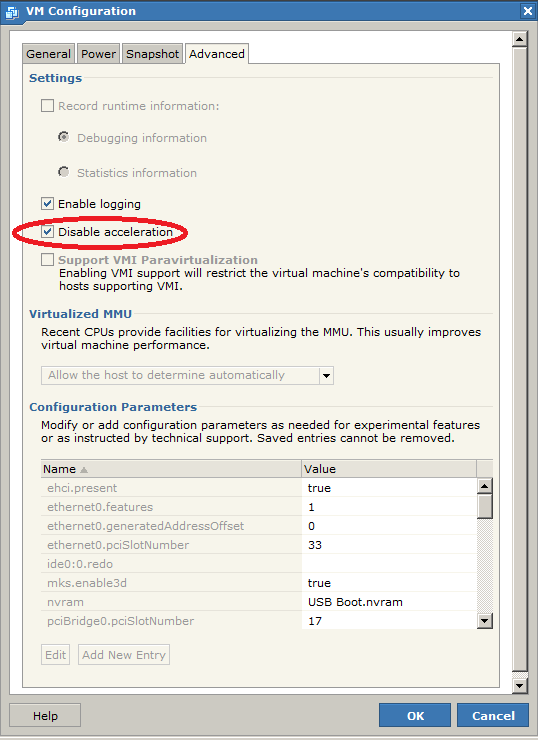
Fig. 2 You may need to disable acceleration (try it first and then enable it when you have a USB drive booting successfully).
7. Now start the VM by clicking on the Console tab and the large Arrow that you see in the Window (Fig. 3) – if you do not see the USB icon (as in the top smaller red ring in Fig. 1 above) appear shortly after clicking the large arrow (and a Windows ‘Ka-Plob’ sound as the UFD is disconnected from the host Windows system), ensure you have a SINGLE USB drive inserted before you start the VM. You may need to run the VM twice before you see the USB icon. When the USB icon appears, wait for about 5-10 seconds before selecting it and you should see an empty tickbox for Kingston USB Mass Storage Device – tick the empty box and you should hear the Windows sound for a USB Device removal – see Fig. 4 below).
Note: Insert the USB drive in a USB 2.0 port. It may not work correctly if it is in a USB 3.0 port.Unsupported embed

Fig. 3 Click the large arrow to start the VM session.
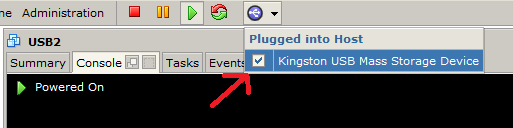
Fig. 4 Once you start the VM, wait a few seconds and select the USB icon and tick the box.
You should hear a re-asssuring ‘USB device removed’ sound from Windows when you do this. No sound – no worky!
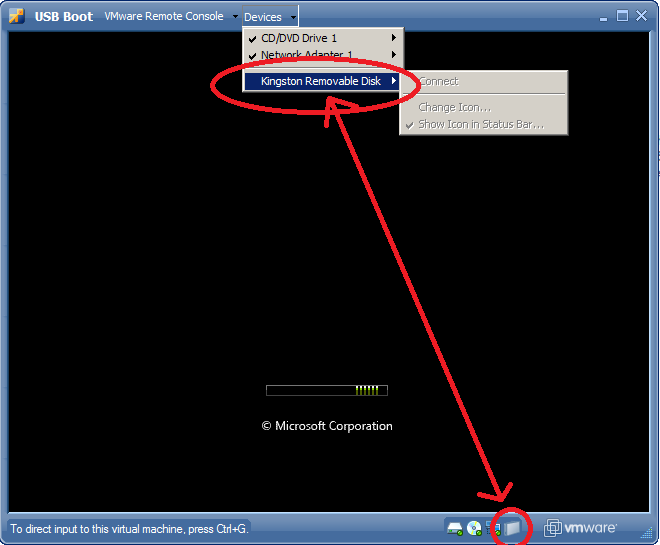
Fig. 5 Check that you have a USB device here – if not then it won’t work!
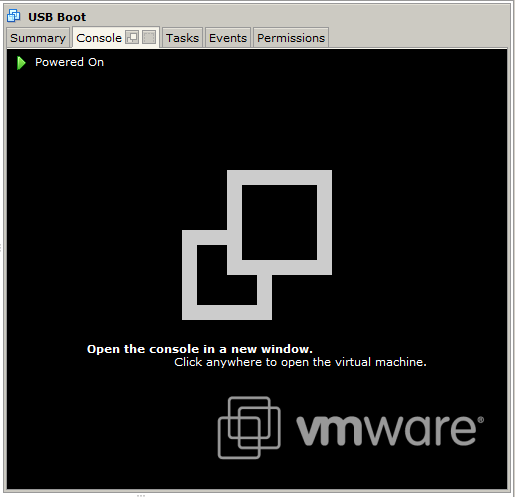
Fig. 6 Now click on the window to open a console and see what is happening.
8. Now click inside the window to window as directed to open the Virtual Machine in a new window (Fig. 7) and when the PLOP menu appears (Fig. 8), click inside the console window again and use the down cursor key to select USB from the PLOP menu and press [Enter] – the USB key should now start to boot!
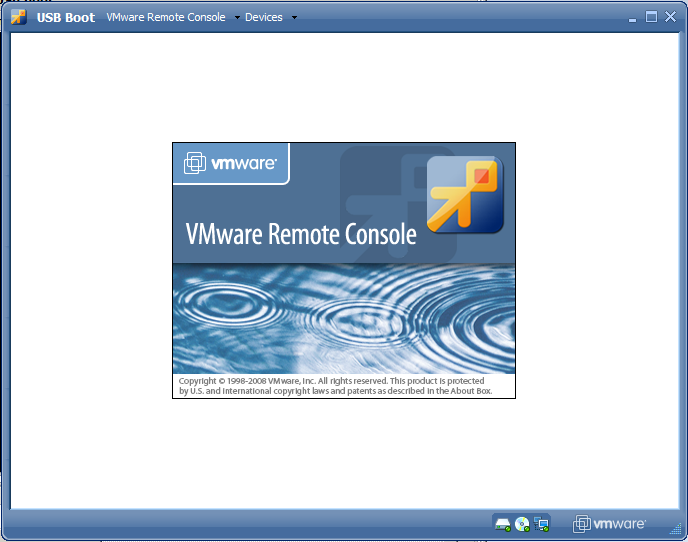
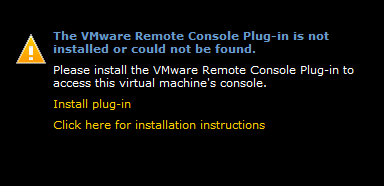
Fig. 7 The VMware Remote Console should start.
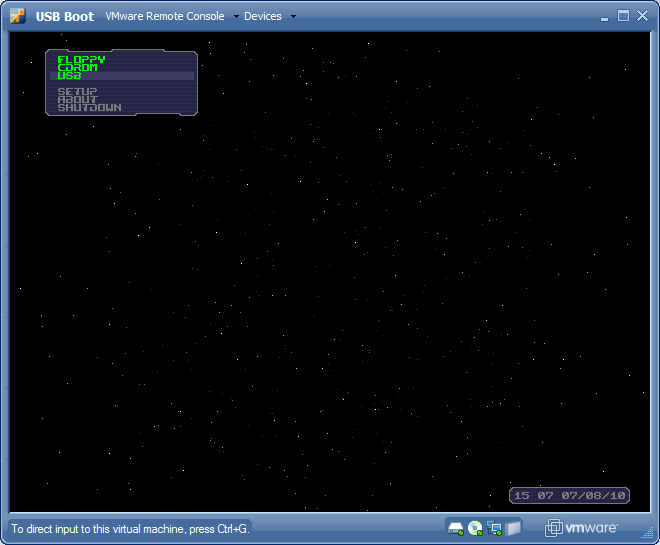
Fig. 8 This is the PLOP boot manager screen – select USB using the cursor keys.
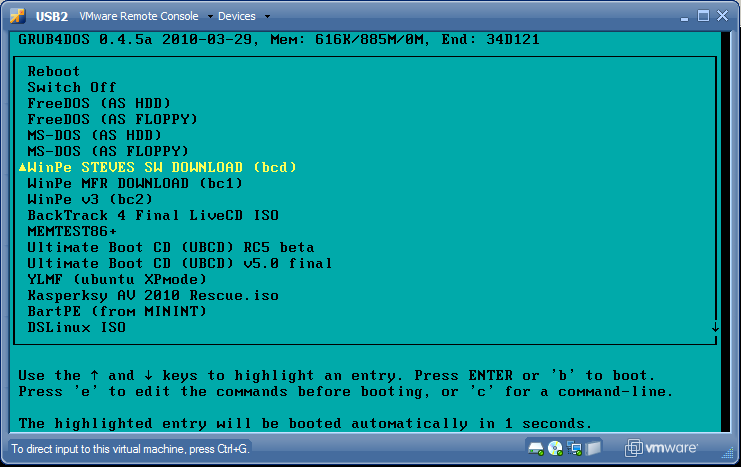
Fig. 9 Here is my grub4dos menu!
Note: Plop! contains a read-only USB driver and so does not support writes to the USB device. If you are booting to grub4dos, you can use the USB 2.0 driver that is built into grub4dos 0.4.6a by using the usb –init grub4dos command at the top of your menu.
If booting to Easy2Boot using Plop! – hold down the SHIFT key as E2B starts to boot to load the grub4dos USB 2.0 driver (or press F8 in the E2B menu and then quickly hold down the SHIFT key). Use a USB 2.0 port. Once loaded, E2B should run faster and a Removable Flash drive will be detected as a Removable drive in the VM.