
Table of Contents
BackTrack is a Linux-based penetration testing arsenal that aids security professionals in the ability to perform assessments in a purely native environment dedicated to hacking. BackTrack has been customized down to every package, kernel configuration, script and patch solely for the purpose of penetration testing. Backtrack also includes some web browsers, and wireless network, video and audio drivers which means on some systems you can boot from your USB stick and have a fully functioning PC/netbook even if you don’t use the testing tools.
Note: BT5 can be booted directly from an ISO file by Easy2Boot (with or without persistence).
See also Tutorial 99 (Xiaopan) for WiFi cracking.
Fig. 1 Backtrack
Type startx to start the GUI…
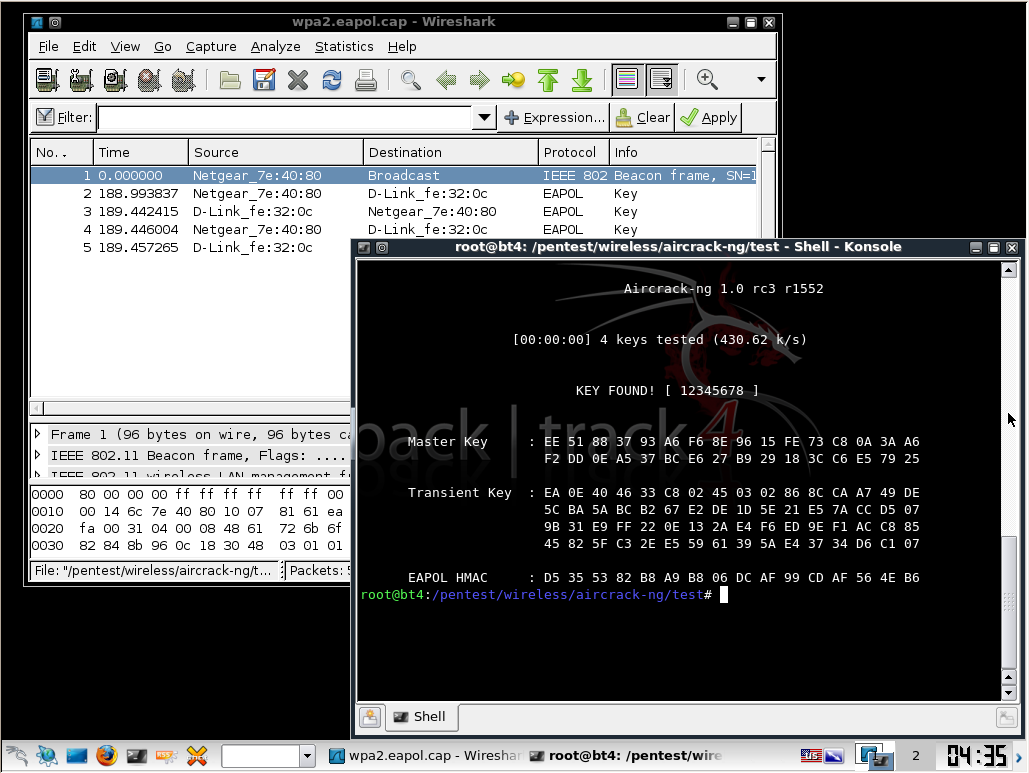
Fig. 2 Click to enlarge
BackTrack can be used to check the security of your wireless network. It also contains FireFox and many other useful tools such as wireshark for tracing PXE boot issues.
WARNING: It is illegal to attempt to hack someone’s network/computer unless you have their permission!
This tutorial uses grub4dos and extracted files from the BackTrack ISO file – you cannot easily boot BackTrack directly from a BackTrack ISO file (News: You can using Tutorial 93!) – see the end of this page for details of a commonly suggested method using the ISO file alone which DOES NOT WORK!.
- Download BackTrack 5 ISO from here
- I suggest you download the Gnome or KDE x86 ISO file.
Note: The KDE 64-bit BT5 has a problem when startx runs and bombs out! There are some workarounds here. - Run RMPrepUSB with settings as below (BackTrack may not fully boot if you format as NTFS!) and click on Prepare Drive (drive letter should be same as used by CloneDrive)
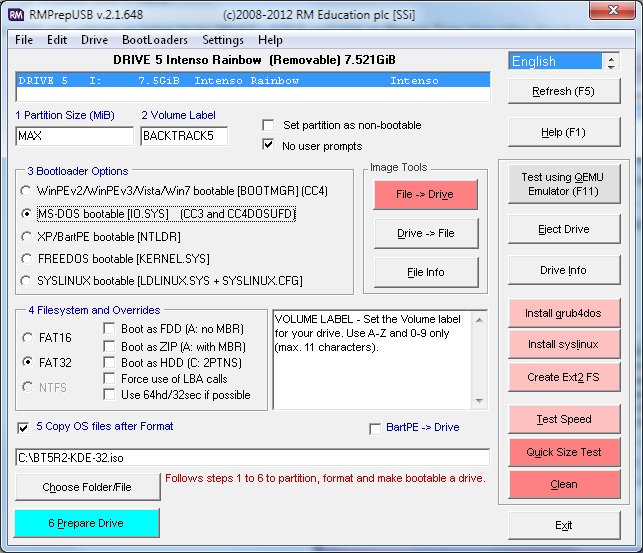
- Fig. 3 Use 1=MAX,3=MS-DOS,4=FAT32,5=for source ISO + Tick COPY OS FILES
- Click on Install grub4dos button and answer OK to all default questions
- USB contents (highlighted = required to be on the USB drive):
\.disk (must be in root of drive – must NOT be moved or ‘Identifying CDROM’ will fail)
README.diskdefines
\casper (can be moved – e.g. \BT5\casper)
\isolinux
md5sum.txt
\preseed (can be moved – e.g. \BT5\preseed)
ubuntu
menu.lst (must be in root of drive)
grldr (must be in root of drive)
casper-rw (must be in root of drive for persistent filesystem)
Menu 1 for a persistent version (you need a casper-rw file on the USB drive)
Menu 2 is for a non-persistent boot
Menu 3 and 4 are examples where the casper and preseed folders have been moved to a \BT5 folder on the USB drive.
title — BACKTRACK 5 —
root
title 1 BackTrack 5 (1024×768) Persistent\nType startx to run GUI once booted PERSISTENT
kernel /casper/vmlinuz file=/cdrom/preseed/custom.seed boot=casper text splash noprompt vga=791– persistent
initrd /casper/initrd.gz
title 2 BackTrack 5 (1024×768) Non-Persistent\nType startx to run GUI once booted NON-PERSISTENT
kernel /casper/vmlinuz file=/cdrom/preseed/custom.seed boot=casper text splash noprompt vga=791– nonpersistent
initrd /casper/initrd.gz
OR
You can copy some of the contentsof the DVD ISO to the \BT5 folder on your USB drive, but you must keep the \.disk folder in the root and use the menus shown below.
#for UK with no splash screen and casper folder moved to \BT5\casper on USB drive
#noprompt suppresses the ‘remove CD’ message on reboot/shutdown – use splash intead of textonly if you prefer. The keyboard setting does not change the GUI keyboard setting.
title 3 BackTrack 5 (1024×768) Persistent\nType startx to run GUI once booted PERSISTENT
kernel /BT5/casper/vmlinuz file=/cdrom/preseed/custom.seed live-media-path=BT5/casper boot=casper locale=en_GB.UTF-8 keyb=uk textonly noprompt vga=791– persistent
initrd /BT5/casper/initrd.gz
title 4 BackTrack 5 (1024×768) Persistent\nType startx to run GUI once booted NON-PERSISTENT
kernel /BT5/casper/vmlinuz file=/cdrom/preseed/custom.seed live-media-path=BT5/casper boot=casper locale=en_GB.UTF-8 keyb=uk textonly noprompt vga=791–
initrd /BT5/casper/initrd.gz
- (optional) – Click on the Create Ext2 FS button and create a file called casper-rw of at least 1000MB (as large as you have space for). This will create a mountable volume for persistent changes.
- Click on Eject button and go try it!
Fig. 4 Press ESC to see any linux error messages whilst loading…
8. Once booted – type startx to start the GUI portion of the OS. You may need to hit the [Enter] key if it sticks at the boot prompt first.
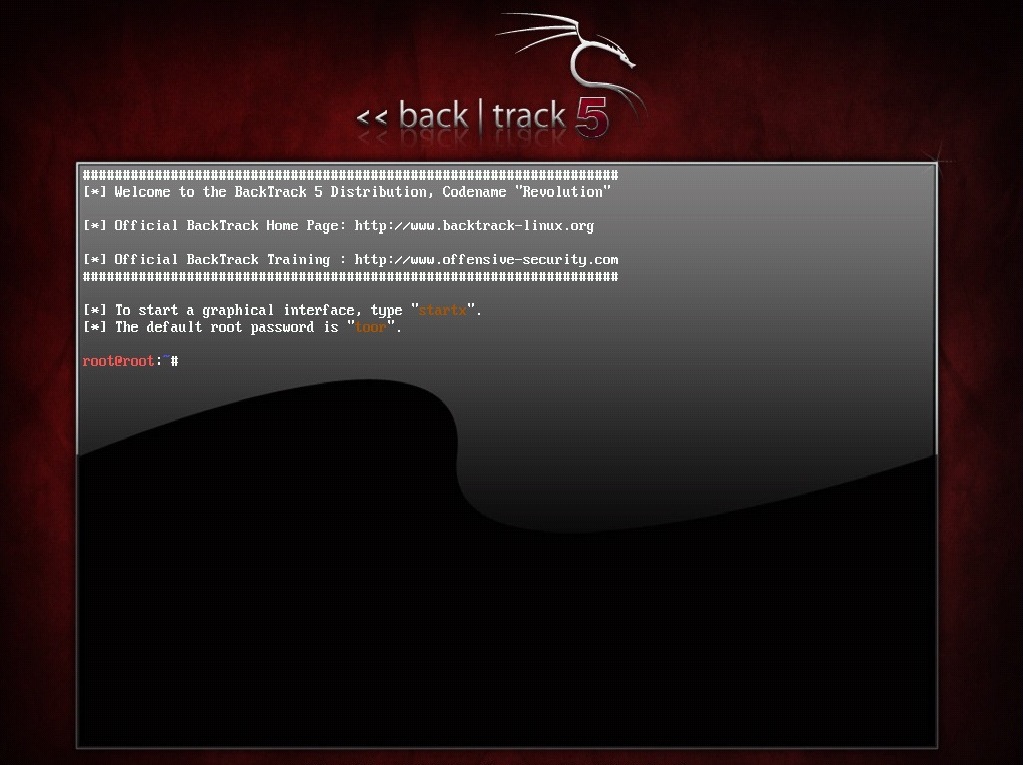
Fig. 5 Type Startx to start the Desktop – username=root password=toor (‘root’ backwards)
To start the network, click on the bottom left icon and then choose Services – Network – Start Network
Change the keyboard locale by clicking on the flag symbol in the bottom task bar.
Change the resolution by clicking on the screen+double-arrow icon on the task bar.
You can browse the web using FireFox or Konqueror.
In case of corruption at a later date – once you have BackTrack working as you like, make a copy of the casper-rw file and save it on a hard disk somewhere. That way you can restore a working copy if it ever gets corrupted.
TROUBLESHOOTING
If the persistent filesystem is damaged, it may not boot and you may see an error message like: EXT2-fs (loop 1 error). In this case delete the casper-rw file and re-make it using RMPrepUSB Create Ext FS again (follow step 6).
If you already have a version of linux that uses a casper-rw persistent file. You can use a persistent file of a different name as follows:
1. Use RMPrepUSB – Create Ext2 FS to create a file called casper-rw (NOTE: DO NOT USE ANY OTHER NAME!).
2. Rename the casper-rw file to BT5-rw (NOTE: YOU MUST RENAME casper-rw to BT5-rw – do NOT simply make a BT5-rw ext2 file!)
3. Modify the menu entry to create/overwrite the 4th partition entry as follows:
# Note: The 4th partition table entry will be destroyed by this line!
partnew (hd0,3) 0x0 (bd)/BT5-rw
Alternatively, you may find it more reliable to delete the casper-rw file and make a new ext3 partition using EaseUS Home Partition Master after shrinking the existing partition. Once you have it all working, you can make a backup of the partition using RMPrepUSB – Disk->File and using the partition number of the ext3 partition (e.g. P3).
If you want to encrypt the USB pen at the same time – follow this video here.
WPA2/WPS/WEP CRACKING WITH REAPER
WPS details here – Note: This only works if WPS is enabled on the target router. If WPS is not enabled then you will see a ‘WARNING: Failed to associate with [MAC ADDRESS] (ESSID: xxxxx).
WPS cracking works by utilizing a crazy flaw! in the protocol. The 8 digit WPS number consists of 7 digits and a checksum digit. If the first 4 digits are incorrect an error message is returned – this means that we only have to crack the first 4 digits and then the next 3!
“An attacker can derive information about the correctness of parts the PIN from the AP´s responses. If the attacker receives an EAP-NACK message after sending M4, he knows that the 1st half of the PIN was incorrect. If the attacker receives an EAP-NACK message after sending M6, he knows that the 2nd half of the PIN was incorrect.
This form of authentication dramatically decreases the maximum possible authentication attempts needed from 10^8 (=100.000.000) to 10^4 + 10^4(=20.000). As the 8th digit of the PIN is always a checksum of digit one to digit seven, there are at most 10^4 + 10^3 (=11.000) attempts needed to find the correct PIN.”
For this reason do not enable WPS on your wireless router/access point (or do not press the WPS button on the router). Just use WPA2 and a long password!
WEP cracking details here
See YouTube videos below for more details.
BackTrack 4
Create a menu.lst file for BT4 on the USB drive with the following contents
title BackTrack 4 (1024×768)\nType startx to run GUI once booted
kernel /boot/vmlinuz BOOT=casper boot=casper nopersistent rw quiet noprompt vga=0x317
initrd /boot/initrd.gz
The casper parameters are detailed here (use this if you want to modify any folders, etc.). e.g. live-media-path=BT5/casper locale=en_GB.UTF-8 keyb=uk textonly noprompt.
The file contents of the USB drive for BT4 should now be:
\boot
\casper
boot.catalog
md5sum.txt
grldr
menu.lst
PLEASE NOTE: Booting BackTrack4/5 FROM AN ISO FILE DOES NOT WORK LIKE THIS!
You cannot boot BT from an ISO (unless you modify files inside the ISO – which I have not tested)!
The menu below do NOT work – backtrack starts to boot but then you get an (initramfs) shell error
title BackTrack 4 (DOES NOT WORK!)
find –set-root /bt4-final.iso
map /bt4-final.iso (hd32)
map –hook
root (hd32)
chainloader (hd32)
However, you can use just an ISO using Tutorial 93!https://www.youtube.com/embed/t8YWqMrE1N4https://www.youtube.com/embed/_SDOwGiWc4khttps://www.youtube.com/embed/rzzgzP4hEo0