
Qemu is a generic and open source virtual machine emulator. Qemu Manager is a front-end GUI for this great tool. Qemu Manager is extremely easy to install and use. This is a quick introduction which allows you to test a bootable USB drive without needing to reboot your system and boot from the USB drive each time for real!
Note: RMPrepUSB v2.1.618 and later versions include QEMU – just press the F11 function key to boot from your USB drive in an emulator!
Also, RMPrepUSB v2.1.707 and later versions enables writes to the USB thus giving true emulation which cannot be obtained using QEMU Manager!
I recommend using the QEMU within RMPrepUSB or using Oracle Virtual Box (see Tutorial #4).
Note: – QEMU_x64 does not seem to be able to run Windows 7 64-bit. Older x86 versions complain that it is not a 64-bit CPU, more recent x86_x64 versions progress beyond this but then crash with a 005D or 007F error. Oracle VM Virtual Box does work however and is much faster – see instructions here.
1. First download and install Qemu Manager v7.0 from here. When installing, choose the default answers only.
2. Now prepare your USB drive so it is ready to test and keep it in the computers USB port (do not ‘Eject’ it)
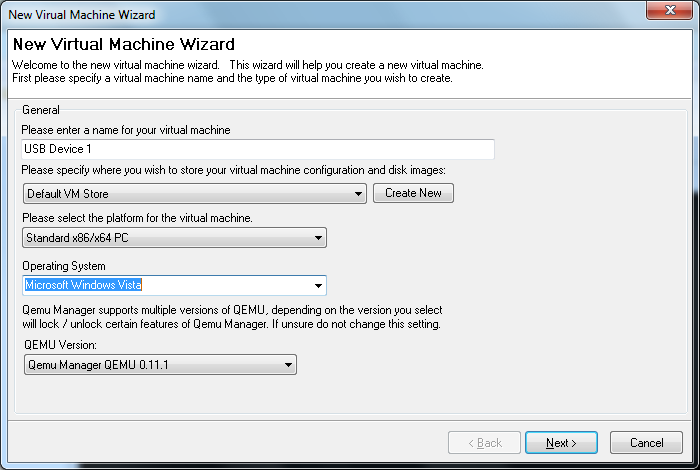
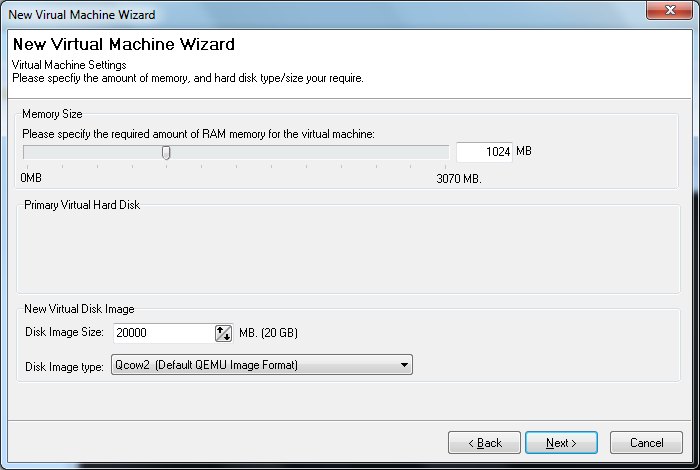
3. Once installed click on the + symbol to create a virtual machine (see screenshots below)
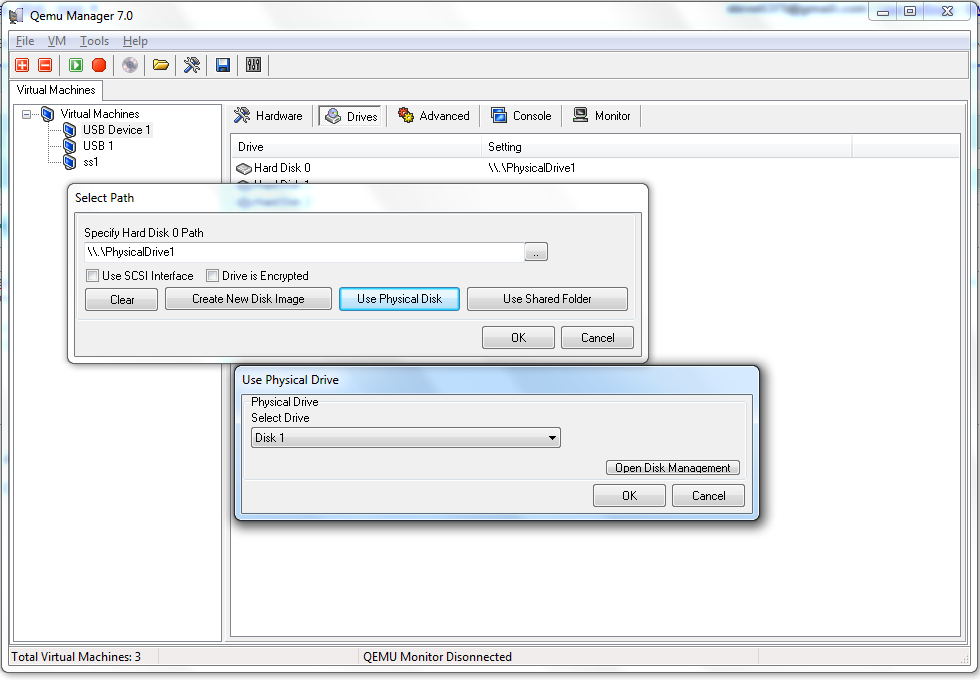
4. Now go to the Drives tab and double-click on the Hard Disk 0 option and set this to the PhysicalDrive number of your USB drive (in my case #1). You can open the Disk Management console to check which drive number your USB drive is.
IMPORTANT NOTE: Qemu sets all drives that point to \\physicaldrive devices (as in this example) to READONLY as Windows locks the volume. Any changes you make to the files on the USB drive itself when running under Qemu, will not actually take affect! If you have bootable DOS files on the USB drive, and it also has batch files or other programs which write to the drive, the writes won’t actually take place when you boot it via Qemu! This means you can only emulate such DOS images when loaded into memory using for instance grub4dos. Linux and XP, etc. payloads will work as they have boot loaders which switch the OS to protected mode and they do not use the emulated BIOS that block DOS/BIOS sector writes.
As physical writes to the USB drive do not work under Qemu (due to Windows locking the device), I would advise you to set the following option in the Advanced section so that writes to the USB drive at least ‘appear’ to work whilst running under Qemu.
Do Not Apply Changes to VM Session = Yes
Any disk/file writes to the USB drive under Qemu will not appear to work unless this option is set. Note that even when this option is set to ‘Yes’, all changes to the USB drive files are still temporary and the drive contents will be reset when you end the Qemu session, so the USB contents will be unchanged. As disk writes do not work unless this option is set, the grub4dos menu savedefault option will not appear to work unless you set this option to ‘Yes’.
NOTE: NEWS! if you use DavidB’s VM_Start.exe utility, you can run QEMU and have USB writes working. Try the latest version of RMPrepUSB v2.1.707 and later!
You can also change the boot order in the Qemu Drives menu if you want to, so that the HDD (your USB drive) boots first.
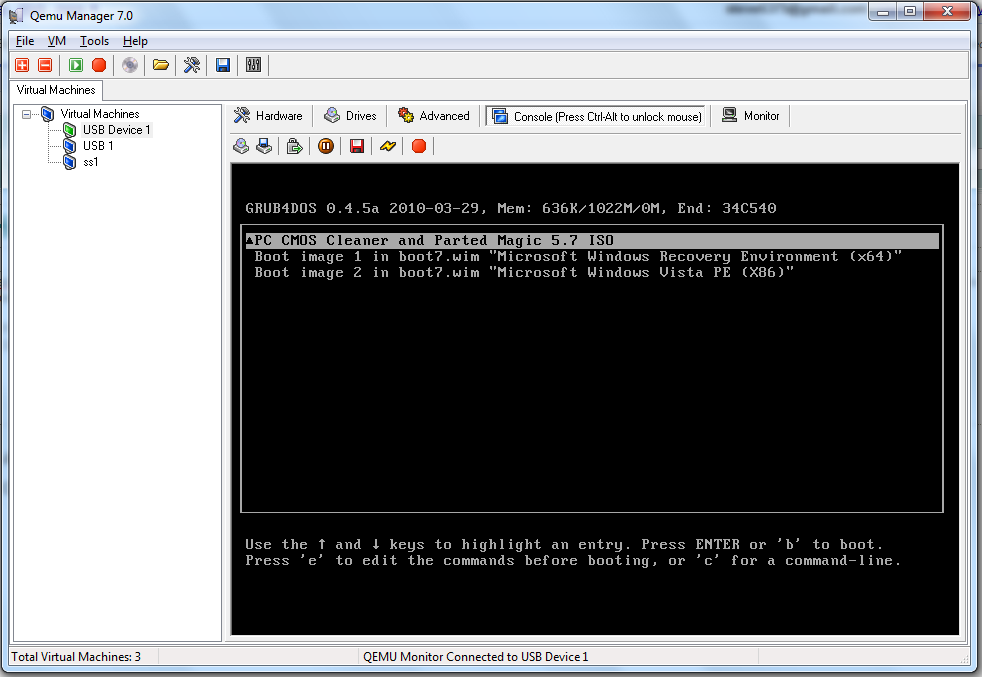
5. Now click on the run button

to start the session.
6. To use the keyboard and mouse within the virtual environment window, click the mouse cursor inside the Qemu black window – you should now be able to interact with the virtual machine just as if you had booted your USB drive from a real system.

7. When you have finished the emulation session, tap CTRL+ALT keys to release the mouse and keyboard back to your Windows computer and click on the red button to stop the virtual machine.
Qemu is not the fastest emulator, but it is very convenient to test initial booting of USB drives. You can even fully boot to linux or WinPE with it to test that a USB drive is bootable or test your grub4dos menus. It is one of the easiest to use to test bootable USB drives.
There is a LOT more you can do with Qemu including loading PLOP (a read only USB driver) or ISO files. It is also very convenient for taking screenshots of actual boot screens like the ones in these tutorials!
For more info on Qemu Manager read the pdf.