
Table of Contents
The new partnew method can be used to boot most linux ISO files (including Ophcrack).
Note: The new partnew method is the same method used by Easy2Boot. Just make an Easy2Boot multiboot USB drive and copy your ISO files to it and boot! For special cases like linux ISOs with persistence, you will also need to add a .mnu file to the Easy2Boot drive.
RMPrepUSB Blog – please leave a comment or feedback on RMPrepUSB or this Tutorial (please mention Tutorial number).
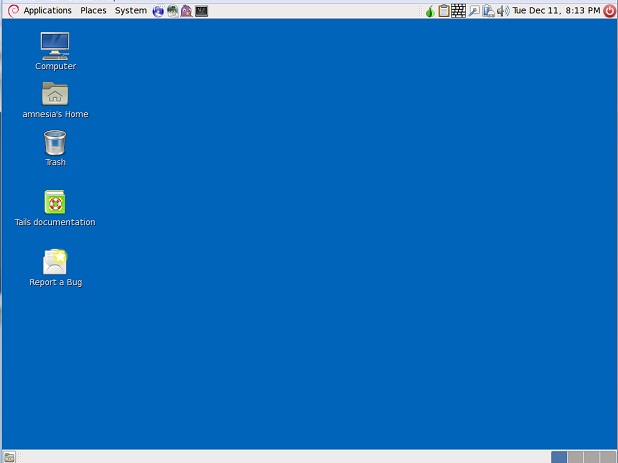
USE ANY COMPUTER WITHOUT LEAVING A TRACE WITH TAILS!
Tails is a Debian based linux which leaves no trace of you ever having used the system. For more details about using Tails – see here. It does not support persistence and the boot device is not accessible to the user.
Tails can be installed to a USB Flash drive, and can be booted from an ISO file on a multiboot USB boot drive if you use the cheat code ‘findiso’ which luckily Tails supports. See this post from Ilko which shows how the findiso cheat code can be used. A tested and working grub4dos menu.lst entry from that post is shown below (as the post is poorly formatted!):
Once you create your Tails boot disc, you’ll be ready to reboot your computer from a USB drive into an encrypted and private operating system preloaded with all the software you’ll need to browse the Web, email, IM, and edit documents.
- Built-in online anonymity: The key feature that’s going to appeal to most people is Tails’ built-in online anonymity. This comes in the form of the customized web browser Iceweasel built using the anonymous Web browsing technology from Tor. The browser also includes popular security extensions like HTTPS Everywhere for secure browsing, Adblock Plus to block ads, and NoScript to block Java and Flash. Other than those features, the web browser works exactly like you’d expect a web browser to work.
- Built-in encrypted email and chat: Additionally, you also get encrypted and private messaging. Tails includes the Claws email client with OpenPGP for email encryption and the instant messaging client Pidgin with an OTR cryptography tool that encrypts your IM conversations.
- Built-in file encryption: When boot Tails from a USB drive instead of a DVD, you can save documents to the thumb drive and they’re automatically encrypted using an encryption specification called LUKS. (Since the DVD is read-only, you can’t save any files – which is its own form of security.)
- A full suite of editing software: On top your web access being private you also get a full suite of work and creative software. Tails comes preloaded with Openoffice for editing documents, Gimp for editing photos, Audacity for editing sound, and lots more additional software
Booting Tails using a menu
You can use the menu below to boot Tails from a USB Flash drive or USB Hard Disk.
Note: If booting from a USB hard disk, you must remove the live-media=removable cheat code (this forces Tails to only look at removable drives when loading the 2nd stage filesystem)!
This also applies if you are booting from a USB Flash drive using a Virtual machine – the VM will treat the USB Flash drive as a Fixed Disk and Tails will not boot if you have live-media=removable set.
Tails does not support persistence on the boot drive for security reasons.
- title Start tails-i386-0.15 LIVE (persistent)
- #http://dl.amnesia.boum.org/tails/stable/tails-i386-0.15/tails-i386-0.15.iso
- #add a casper-rw ext2 file to your USB drive using RMPrepUSB Create ext2 FS button for persistence
- set ISO=/tails-i386-0.15.iso
- ls %ISO% > nul || find –set-root –devices=hf %ISO%
- map %ISO% (0xff) || map –mem %ISO% (0xff) || map –mem –heads=0 –sectors-per-track=0 %ISO% (0xff)
- map –hook
- root (0xff)
- #note kernel line below is one long line followed by one initrd line
- kernel /live/vmlinuz findiso=%ISO% boot=live config live-media=removable noprompt timezone=Etc/UTC block.events_dfl_poll_msecs=1000 splash nox11autologin module=Tails quiet splash
- initrd /live/initrd.img
- root (bd)
Tails also requires to see a USB device (not a virtual hard disk), so test using a real system.
Note: This no longer seems to work with Tails 3.16! Instead use Easy2Boot and convert the ISO to a .imgPTN file.
THE NEW METHOD (USING PARTNEW)
However, this tutorial shows another method of adding a linux ISO to your grub4dos multiboot USB drive which will work with almost 100% of linux ISOs!
Yes, this method should work with almost ANY linux ISO file, even those that do not have a cheat code for post-loading of the ISO file!
The method described below was previously outlined by cdob on reboot.pro here. This method can be used with many linux ISOs but may be particularly useful if you have an NTFS boot partition but the linux version you want to boot to does not support the NTFS filesystem.
This method is used by Easy2Boot (a multiboot USB drive that will boot almost any boot able file just by copying it on!).
PLEASE NOTE: Your boot USB drive must not have more than 3 primary partitions. This procedure writes an entry in the the fourth partition entry in the partition table.
Tails is ‘special’ however, in that you can only use the method below on a USB Flash drive – it won’t work on a USB HDD. However, 99% of most other linux livecd ISOs do work.
INTRODUCTION
The menu below can be used with most linux ISO files.
METHOD
This tutorial assumes that you already have a grub4dos multiboot USB drive. If you do not already have one, then make one using RMPrepUSB (follow steps 1 and 2 in this tutorial)
Again, be aware that the new grub4dos menu will write a new partition table entry on your USB boot drive (a fourth entry) – this will destroy any existing partition entry that may already be in the fourth position!
Typically most bootable USB drives have only one or two partitions. You can check the four partition table entries on your USB drive using RMPrepUSB – Drive Info – 0.
Booting direct from an ISO also prevents any malware from changing any files in the ISO.
NOTE: Tails is ‘special’ and does not boot from a USB Hard Disk (FAT32 or NTFS) using the partnew method described below!
Step 1
Download a linux ‘live’ ISO and copy it to your grub4dos USB drive
Step 2
Edit the menu.lst file (press F4 in RMPrepUSB to load it into Notepad). Add the following text to your menu (make sure the set ISO= line has the exact same name as your ISO file)..
- # GENERIC – BOOT ANY LINUX FROM ISO
- # This menu can be used for to boot any linux iso file
- # It is especially useful if your boot drive is NTFS but linux does not understand NTFS once it boots and so cannot boot further
- # WARNING: permanently alters the boot device’s partition table (adds a 4th ptn entry)!
- # Use with care as it will obliterate ptn 4 on the boot device if it already exists!
- # see http://reboot.pro/topic/9916-grub4dos-isohybrided/page-2#entry88531 for details
- iftitle [if exist /linux.iso] My linux (boot from ISO)
- set ISO=linux.iso
- # check and make an empty table entry in 4th position in ptn table
- parttype (hd0,3) | set check=
- set check=%check:~-5,4%
- if “%check%”==”0x00” partnew (hd0,3) 0 0 0
- if not “%check%”==”0x00” echo WARNING: PTN TABLE 4 IS ALREADY IN USE! && pause && configfile /menu.lst
- ls (hd0,0)/%ISO% && partnew (hd0,3) 0x00 /%ISO%
- map /%ISO% (0xff)
- echo -e \r\n
- map –hook
- root (0xff)
- chainloader (0xff)
Note that Tails requires a Removable USB drive!
Step 3
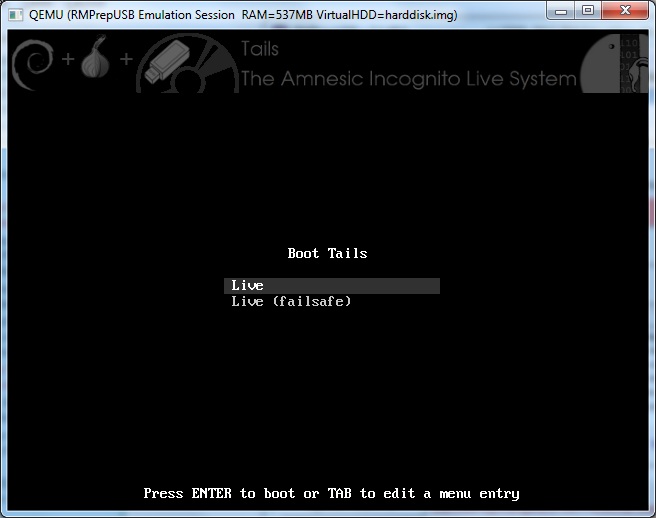
Test your menu entry on a REAL SYSTEM – it won’t work under QEMU because disk writes will not work correctly under QEMU (unless you use the QEMU in RMPrepUSB)!
Alternatively, use Virtual Box + DavidB’s VMUB utility.
Note: Once the menu entry has been run, you will have a (nonsensical and overlapping) 4th partition entry (but of type 0 so Windows should not see it).
The new 4th partition will be set to start at a position just after the start of the ISO file and the partition length will be set to the length of the ISO file. It will look to linux as if there is a valid CDFS filesystem in partition 4 which linux will mount and then access for the rest of it’s boot files (squashfs, etc.).Unsupported embed
RUNNING OPHCRACK FROM AN ISO
Ophcrack will boot from an ISO using this ‘partnew’ method (as used by Easy2Boot), however it will be unable to find the \tables folder.
The easiest way to fix this is simply to extract the top \tables folder from the ophcrack ISO(s) and place it in the root of your USB drive (USB:\tables\xxxx).
Note that this does not work for an exFAT USB drive because the Ophcrack linux distro cannot read exFAT volumes.
e.g. for Easy2Boot you would have this folder structure:
\tables\vista_free\(files here – e.g. table0.ind)
\_ISO\MAINMENU\ophcrack-vista-livecd-3.6.0.iso
You can add both the XP and Vista/7 tables to the same \tables folder and thus be able to crack Windows XP/Vista/7 passwords.
You can download more tables and put each set of tables in its own directory under \tables (its name is not important, all folders under \tables will be searched):
tables\vista_free
tables\vista_special
tables\XP_special
WARNING: 2014 version does not support USB 3.0 or exFAT. Use a USB 2.0 port (even if using a USB 3.0 drive in a USB 2.0 port). FAT32 and NTFS is OK.
Note: if you do extract the \tables folder from the ISO file, you can simply delete the large \tables folder from the ISO using a suitable ISO editing tool like ISO Maker or Daemon Tools Pro.
Better still, use the small ISO ophcrack-notables-livecd-3.6.0.iso and download the tables separately.
\tables\vista_free\(files here – e.g. table0.ind)
\_ISO\MAINMENU\ophcrack-notables-livecd-3.6.0.iso
Ophcrack FAQ here.
If you don’t want to add the large \tables folder separately, try this…
Booting Ophcrack from an ISO without extracting the \tables folder
Ophcrack version 3.4.0, do the following:
1. After booting from the Ophcrack ISO file, launch the bash shell by clicking on the black square icon at the top left of the Desktop
2. Type su and use the password root to get superuser access rights
3. We need to mount the ISO partition (4th partition) which is normally sdb4 on a single disk system – so type
mkdir /media/oph
mount /dev/sdb4 /media/oph
Note: This example assumes that your USB device will be the second disk in your system (i.e. the system has just one internal hard disk, sda, and no other external drives connected), if you have several drives connected, you may need to specify sdc4 or sdd4 rather than sdb4.
…try this procedure if you are not sure what device the 4th partition of the USB drive has been detected as by linux…
First click on My Documents folder on Desktop and then click on the drive symbol for your USB drive – if you have clicked on the correct USB drive, it should immediately change it’s name to SliTaz ophcrack and you should be able to see a tables and boot folders within it, then in a console window, now type …
mkdir /media/oph
mount
(look at what \dev\sdx4 device is mounted as /media/SliTaz ophcrack – e.g. it could be /dev/sdb4). The entry should always end in 4 as it is the fourth partition.
In the Explorer GUI window, right-click on the SliTaz ophcrack device and choose Unmount File System to unmount it. Now mount it to sdb4 by typing…
mount /dev/sdb4 /media/oph
4. Now double-click on the Launcher desktop icon and choose ‘Search‘ from the Ophcrack Launcher menu list
Here is an example grub4dos menu.lst entry (cut and paste it into your menu):
- # make empty table entry in 4th position in ptn table before running any menu entry
- parttype (hd0,3) | set check=
- set check=%check:~-5,4%
- if %check%==0x00 partnew (hd0,3) 0 0 0
- if not %check%==0x00 echo WARNING: PTN TABLE ENTRY 4 IS ALREADY IN USE! && pause
- # menu entry for Ophcrack ISO
- title (ISO) OphCrack Password Cracker XP 3.4.0 from ISO (using partnew)\nTo find the tables type: su root, mkdir /media/oph, mount /dev/sdb4 /media/oph and then run Launcher.
- set ISO=/ophcrack-XP-livecd-3.4.0.iso
- find –set-root %ISO%
- parttype (hd0,3) | set check=
- set check=%check:~-5,4%
- if %check%==0x00 partnew (hd0,3) 0x00 %ISO%
- if NOT %check%==0x00 echo ERROR: Partion Table entry 4 already exists – so will not map %ISO% to ptn 4 ! && pause –wait=3 && configfile /menu.lst
- map %ISO% (0xff)
- map –hook
- root (0xff)
- chainloader (0xff)
MORE EXAMPLES
See here for a list of ISO files that have been tested.
Some linux ISOs can be found on this page – here are some I tested and worked…
- title raring-dvd-i386.iso\nEdubuntu 13.04 Alpha 1 Test Build
- set ISO=/raring-dvd-i386.iso
- find –set-root %ISO%
- parttype (hd0,3) | set check=
- set check=%check:~-5,4%
- if %check%==0x00 partnew (hd0,3) 0x00 %ISO%
- if NOT %check%==0x00 echo ERROR: Partion Table entry 4 already exists! && pause –wait=3 && configfile /menu.lst
- map %ISO% (0xff)
- map –hook
- root (0xff)
- chainloader (0xff)
- title systemrescuecd-x86-3.1.2.iso\nSystemRescueCD
- set ISO=/systemrescuecd-x86-3.1.2.iso
- find –set-root %ISO%
- parttype (hd0,3) | set check=
- set check=%check:~-5,4%
- if %check%==0x00 partnew (hd0,3) 0x00 %ISO%
- if NOT %check%==0x00 echo ERROR: Partion Table entry 4 already exists! && pause –wait=3 && configfile /menu.lst
- map %ISO% (0xff)
- map –hook
- root (0xff)
- chainloader (0xff)
- title Load xbmcbuntu-12.00-RC1.Intel-NVIDIA.iso
- debug off
- # set the path and filename on this next line
- set ISO=/_ISO/Linux/xbmcbuntu-12.00-RC1.Intel-NVIDIA.iso
- # make empty table entry in 4th position in ptn table
- parttype (hd0,3) | set check=
- set check=%check:~-5,4%
- if “%check%”==”0x00” partnew (hd0,3) 0 0 0
- if not “%check%”==”0x00” echo ERROR: PTN TABLE ENTRY 4 IS ALREADY IN USE! && pause && configfile /menu.lst
- # map the iso file to a partition
- ls %ISO% > nul && partnew (hd0,3) 0x00 %ISO% > nul
- debug 1
- map %ISO% (0xff)
- echo -e \r\n
- map –hook
- root (0xff)
- kernel /casper/vmlinuz boot=casper live-media-path=/casper nopersistent quiet splash —
- initrd /casper/initrd.lz