
Table of Contents
Fedora can boot directly from an ISO file placed on a USB drive using the following menu, however I have not found a way to boot directly from an ISO and have persistence.
To boot directly from an ISO without persistence, you can use one of the following menus (or just copy the ISO over to your Easy2Boot USB flash drive!)
- title Boot Fedora directly from ISO (not persistent)
- # Note that partition 4 of your USB flash drive will be destroyed by this next command! Make sure it is not in use!
- partnew (hd0,3) 0x00 /fedora.iso
- map (0xff) /Fedora.iso
- map –hook
- root (0xff)
- chainloader (0xff)
Tip: Easy2Boot will also boot Fedora (and just about any other linux ISO!) just by copying the ISO file to the USB drive.
Easy2Boot also has a .mnu file that will allow you to boot Fedora with an ext3 persistence file.
BOOT FEDORA WITH PERSISTENCE
NOTE: The boot volume must be formatted as FAT32 (NTFS is not supported).
To boot to an NTFS Easy2Boot multiboot USB drive with persistence (MBR and UEFI) see here.
Here is how to add it to your grub4dos USB drive by extracting the files from a Fedora ISO…
1. Download your Fedora ISO file – I used the KDE Spins versions here (Fedora-16-i686-Live-KDE.iso), version 17 also works fine.
2. If you don’t already have a ready-prepared USB grub4dos bootable drive then make one now by formatting a drive as FAT32 (not NTFS!) using RMPrepUSB and then click on the Install grub4dos button to install grub4dos and copy over grldr.
3. Mount the ISO file using ImDisk or Virtual CloneDrive or your favourite utility so that you can copy the files from within it to your USB drive.
4. Copy the entire LiveOS folder from the ISO file to the USB drive – you should now have a /LiveOS folder on your USB drive
5. From the /isolinux folder within the mounted ISO file, copy the files vmlinuz0 and initrd0.img to the /LiveOS folder on your USB drive
6. Now add the following entry to your existing menu.lst file (press F4 in RMPrepUSB to load the menu.lst from the USB drive or create a new one) – note: there are only 7 lines (one line wraps over!).
LIVE must be changed to match the volume label of your USB drive if not using the second UUID menu.
- title FEDORA (PERSISTENT)
- uuid () > nul
- set UUID=%?%
- echo %UUID%
- if not exist /LiveOS/overlay-LIVE-%UUID% echo WARNING: Changes will not be remembered unless a /LiveOS/overlay-LIVE-%UUID% ext2 file is created! && pause
- kernel /liveos/vmlinuz0 root=live:UUID=%UUID% rootfstype=auto rw liveimg overlay=UUID=%UUID% quiet rhgb rd.luks=0 rd.md=0 rd.dm=0 xdriver=vesa nomodeset
- initrd /liveos/initrd0.img
- # ALTERNATIVE: This example uses \fedora.img as the persistence file and it is easier to set up – Fedora 25 used
- title FEDORA 25 with persistence (/fedora.img)\n Boot to Fedora with persistence
- uuid () > nul
- set UUID=%?%
- echo UUID=%UUID%
- if not exist /fedora.img echo WARNING: Changes will not be remembered unless a /fedora.img ext file is created! && pause
- kernel /syslinux/vmlinuz root=live:UUID=%UUID% rd.live.overlay=/dev/disk/by-uuid/%UUID%:/fedora.img rd.live.dir=/LiveOS rootfstype=auto rw rd.live.image quiet splash vga=791 rhgb rd.luks=0 rd.md=0 rd.dm=0 xdriver=vesa nomodeset
- initrd /syslinux/initrd.img
- boot
NOW ADD PERSISTENCE…
The Alternative menu is easier to use, just create an ext3 file called \fedora.img.
To use the first menu, follow these instructions…
To make a Fedora USB boot pen with persistence (it will remember your settings and updates, etc.) follow the steps 1-6 above and then:
1. Boot to grub4dos and run the FEDORA menu entry
2. You should be prompted with the name of the missing file required for persistency – e.g. overlay-LIVE-C245-7B4E
3. Run RMPrepUSB and use the Create Ext2 FS button to create a file of name overlay-LIVE-C245-7B4E using the same number that was returned in step 2
Ensure the size is at least 1GB (preferably 2-4GB).
4. Move the overlay file from the root of the drive to the \LiveOS folder
Note: LIVE must be the volume label of the USB drive. If you volume label is RMPREPUSB and the UUID is 1234-ABCD, then the file must be called overlay-RMPREPUSB-1234-ABCD and you must change the menu entry from LIVE to RMPREPUSB.
You \LiveOS folder should now contain these 4 files:
- \LiveOS\vmlinuz0
- \LiveOS\initrd0.img
- \LiveOS\squashfs.img – you will get a message about live-rw not found if this is not inlcuded!
- \LiveOS\overlay-LIVE-C245-7B4E – last characters will differ for each USB drive depending on volume label and UUID – or \fedora.img if using the Alternate menu
Alternatively, try using Fedora Live USB Creator and set the persistent overlay size (the larger the better as the data is stored uncompressed). However, I did find that this crashed if booting with version 17.
Always test on REAL HARDWARE at first, not a VM (though Oracle VBox works well and with persistence if you follow Tutorial #4 and use DavidB’s StartVM.exe utility).
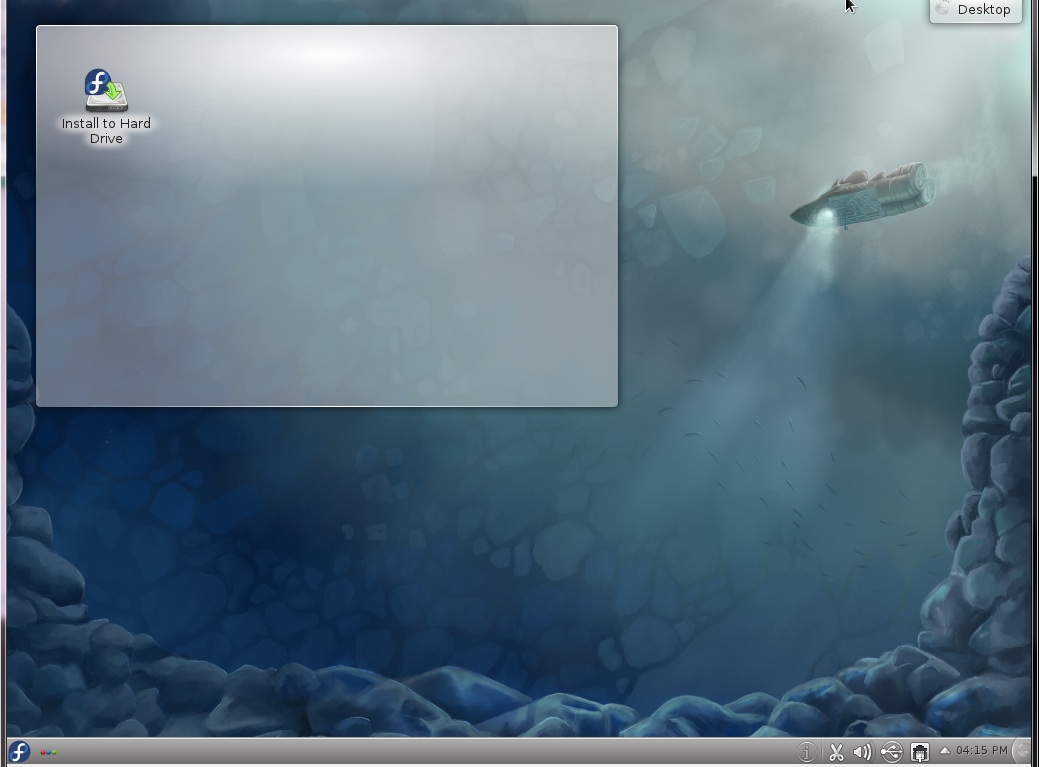
To install Fedora onto an internal hard drive using your USB drive, click on Activities and choose Install to Hard Drive. Follow the installation guide here.
Persistence for later versions of Fedora (2020/2021)
Follow these instructions for Easy2Boot.
Later versions require there to be some empty directories in the persistence file before it will be recognised as a valid persistence file:
- Boot to the .imgPTN23 image using the new ‘Fedora + persistence’ menu entry
- Activities – (Search) – Show Applications – Disks
Look for the fedora.img file (in my case it was /dev/loop2 – see screenshot below) - At the Desktop, open a Terminal console (Activities – (Search) – ‘terminal’)
- In the terminal console type
mount
look for the same loop device. In my case is was mounted as /run/initramfs/overlayfs - Type
cd /run/initramfs/overlayfs/ (or whatever your mount point was)
(you can type ls to ensure it is empty except for lost+found) - Type
sudo mkdir overlayfs
sudo chcon –reference=/. overlayfs
sudo mkdir ovlwork
Now reboot (using the Restart menu) and boot to Fedora+Persistence again.
For Fedora 36, add selinux=0 and nomodeset to the kernel paramaters
FEDORA 18
Boot Fedora with persistence directly from ISO
Create the overlay file in the \LiveOS folder as instructed above. The squashfs.img must be extracted from the ISO.
The ISO is the only other file needed which can be placed anywhere if you change the path.
- \LiveOS\squashfs.img – you will get a message about live-rw not found if this is not included!
- \LiveOS\overlay-LIVE-C245-7B4E – last characters will differ for each USB drive depending on volume label and UUID
- \_ISO\MAINMENU\Linux\/_ISO/MAINMENU/Linux/Fedora-18-i686-Live-LXDE.iso
The USB drive MUST be FAT32 (NTFS does not boot!).
WARNING: This menu assumes that the 4th partition entry on the USB drive is unused.
- title FEDORA 18 boot from ISO – PERSISTENT
- # set VOL to the volume label of the USB drive
- set VOL=LIVE
- echo Note: USB drive Volume Label must be %VOL%
- #enable parttype output
- debug 1
- # make empty table entry in 4th position in ptn table
- parttype (hd0,3) | set check=
- debug off
- set check=%check:~-5,4%
- if not “%check%”==”0x00” echo WARNING: PTN TABLE 4 IS ALREADY IN USE! && pause && configfile /menu.lst
- debug 1
- uuid () > nul
- set UUID=%?%
- echo UUID=%UUID%
- if not exist /LiveOS/overlay-%VOL%-%UUID% echo WARNING: Changes will not be remembered unless a /LiveOS/overlay-%VOL%-%UUID% ext2 file is created! && pause
- # WARNING: This next line destroys the 4th Primary Partition entry on the boot device!
- partnew (hd0,3) 0x00 /_ISO/MAINMENU/Linux/Fedora-18-i686-Live-LXDE.iso
- map /_ISO/MAINMENU/Linux/Fedora-18-i686-Live-LXDE.iso (0xff)
- map –hook
- root (0xff)
- kernel /isolinux/vmlinuz0 root=live:UUID=%UUID% rd.live.overlay=UUID=%UUID% rootfstype=auto rw rd.live.image quiet rhgb rd.luks=0 rd.md=0 rd.dm=0
- initrd /isolinux/initrd0.img
The Official Live USB Creator tool did not give a persistent boot for Fed 18
The Live USB Creator tool uses syslinux:
- menu label ^Run Fedora 18 LXDE Live
- kernel /multiboot/fedoraLXDE18/isolinux/vmlinuz0
- append initrd=/multiboot/fedoraLXDE18/isolinux/initrd0.img root=live:LABEL=MULTIBOOT overlay=UUID=DB49-9F70 live_dir=/multiboot/fedoraLXDE18/LiveOS rootfstype=auto ro rd.live.image quiet rhgb rd.luks=0 rd.md=0 rd.dm=0
/multiboot/fedoraLXDE18/LiveOS holds the squashfs.img (live_dir)
/LiveOS/overlay-LIVE-xxxx-yyyy was the persistence file created by the Creator tool
GRUB2 MENU
The basic menu is:
- #WORKS – needs FAT32, not NTFS!! Fedora-Live-Workstation-i686-23-10.iso
- menuentry “Fedora Live Workstation EXTRACTED PERSISTENT (FAT32-only)” –unrestricted –class fedora {
- set root2=(hd0,msdos1)
- set root=$root2
- probe -u $root2 –set=root2uuid
- probe -l $root2 –set=root2vol
- echo “Persistent file should be $root2/LiveOS/overlay-$root2vol-$root2uuid”
- echo “Persistent file Volume name should be LIVE”
- if [ ! -e $root2/LiveOS/overlay-$root2vol-$root2uuid ] ; then echo ERROR: $root2/LiveOS/overlay-$root2vol-$root2uuid not found! ; echo Press ENTER to continue ; read ; fi
- loopback loopo $root2/LiveOS/overlay-$rootvol-$root2uuid
- probe -l (loopo) –set=loopol
- if [ ! $loopol = “LIVE” ]; then echo “ERROR: $root2/LiveOS/overlay-$root2vol-$root2uuid has volume label of $loopol, not LIVE!” ; read ; fi
- set gfxpayload=1024×768,800×600
- linux /LiveOS/vmlinuz0 root=live:UUID=$root2uuid rd.live.overlay=UUID=$root2uuid live_dir=/LiveOS rootfstype=auto rw rd.live.image quiet splash rhgb rd.luks=0 rd.md=0 rd.dm=0 nomodeset
- initrd /LiveoS/initrd0.img
- boot
- }
See http://rmprepusb.blogspot.co.uk/2016/05/fedora-persistence-using-grub2.html for more details
Also https://rmprepusb.blogspot.com/2017/04/add-fedora-with-persistence-to-e2b.html (Updated for Fedora 33) and https://easy2boot.xyz/fedora-33-with-persistence/