
Table of Contents
MakeISO.exe by Erwan
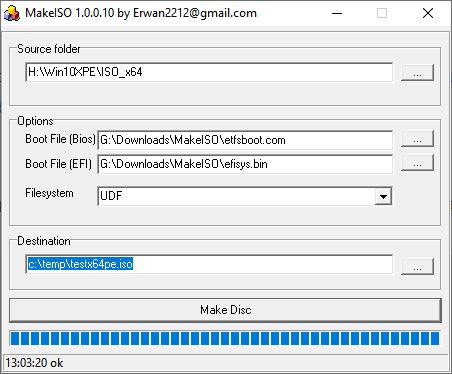
This Windows executable will make various bootable ISO files. You can configure some of the Boot File options by right-clicking on the … box too (e.g. Floppy disk or hard disk emulation, add a patch table).
The download includes the necessary Windows legacy and EFI boot files (etfsboot.com and efisys.bin – see screenshot) as well as folders for grub2, grub4dos and isolinux folders which you can use a templates to make your ISO boot to either of those three bootloaders.
You can choose ISO9660/Juliet/UDF filesystems for the ISO or a combination.
More information here.
Grub4DOS ISOs
If you already have a working bootable USB stick that uses grub4dos and a grub4dos menu, you might want to make a bootable ISO file from it. This tutorial explains how to do it. If you have a Windows USB drive, you can easily add grub4dos so that it will still legacy boot to Windows (see below).
I recommend using grub4dos 0.4.6a as use by RMPrepUSB (note: there are two completely different versions – one for Legacy only as used by RMPrepUSB and one for UEFI only.
Grub4dos (0.4.5c) can read files on a CD/DVD ISO 9660 CDFS filesystem and the RockRidge filesystem, but not the Joliet filesystem – thus CDs/DVDs or ISOs that are prepared with no RockRidge extensions will only be read by grub4dos as ISO 9660 standard (filenames will be 8.3).
Note: Grub4dos 0.4.6a can read Joliet ISOs.
What this means is that with some ISOs (or when you boot from a CD/DVD), grub4dos may not be able to access a particular file if it has a long filename: e.g.
title test iso
map /myiso.iso (0xff)
map --hook
root (0xff)
Note that grub4dos does not usually care about case on FAT, exFAT and NTFS volumes. Spaces must be preceded by \ (e.g. /my\ iso.iso)
Also, be aware that your grub4dos menu.lst file may need modifying because your files will be on a CD and not a ‘hard disk’ when the ISO boots. Therefore if you have any commands which expect two hard disks to be present, i.e. (hd0) and (hd1), or you have hard coded the payload files as (hd0,0)/xxxx, or if you have excluded CD’s from any file ‘find’ commands used in the menu, then when you boot from an ISO you cannot expect these to work! You can use () or (bd) as a device name for the boot device or just use / in your menus.
If you have downloaded and installed the Microsoft WAIK you can use the Microsoft OSCDIMG.exe utility.
If you do not have OSCDIMG.exe then you will need to download MKISOFS.exe.
To test that your ISO boots correctly, I recommend you load the ISO file in QEMU (use RMPrepUSB File – Boot from ISO file using QEMU Emulator) which allows you to emulate booting direct from the ISO file under Windows just as if it were a CD/DVD but without affecting your Windows system.
Some of the oscdimg information has been taken from this forum post and I have used the switches suggested by jaclaz/Wonko-the-Sane (thanks!).
Make a Windows 7/8/10 Legacy-bootable ISO from a USB drive
- Extract the contents of a bootable Windows ISO to a USB drive (or use an existing Windows USB drive)
- Click ‘Install grub4dos’ and answer Y for MBR boot code and copy over the grldr file to the USB drive
- Press F4 in RMPrepUSB and add a single line of text in the Notepad window that opens…
chainloader /bootmgr - Click the Files – ‘Make grub4dos ISO from Drive‘ to automatically convert the selected grub4dos bootable USB drive to an ISO file as below.
TO MAKE A GRUB4DOS ISO FILE
Use RMPrepUSB and use Files – ‘Make grub4dos ISO from Drive‘ to automatically convert the selected grub4dos bootable USB drive to an ISO file!
RMPrepUSB will run a .cmd script to make a grub4dos bootable ISO file.
If your USB drive has WinPE files (i.e. bootmgr, \boot\BCD and boot.wim) then add oscdimg.exe to the RMPrepUSB installation’s \QEMU folder. ‘Make grub4dos ISO from Drive’ will then use oscdimg to make the ISO instead of mkisofs which does not make bootable WinPE ISO properly.
Note that it does not alter the menu.lst file, so you must ensure your menu.lst is suitable to run from a CD/DVD.
If you wish to use a similar manual process using a Windows .cmd script, then follow steps 1 and 2 below…
HISTORY
2013-01-01 – I have changed the mkisofs download link to point to a cygwin version – the old link used a version of mkisofs.exe that had a 2GB ISO size limitation. The cygwin version of mkisofs.exe has a 4GB size limitation. If this is still a problem then use oscdimg instead!
2013-05-26 – Changed makegrub4dosiso.cmd to use start segment of 7C0 for better compatibility with some BIOSes!
USE A WINDOWS .CMD SCRIPT
1a. If you already have Microsoft Windows WAIK installed…
1. Download the Makegrub4dos.zip file from the Download – Beta Downloads page – extract the cmd file and place it in the same folder that you want your ISO file to be made in (or an empty folder)
2. In the Windows Start Menu – click on the Deployment Tools Command Prompt to open a Command Prompt window
1b. If you do not have Microsoft Windows WAIK installed…
1. Create a new empty folder on your hard disk (e.g. C:\MAKEISO)
2. Download (sorry – the file seems to be no longer available!) mkisofs.exe and the dll (note: this is a cygwin (4GB) version, MinGW versions only make files up to 2GB!)
3. Download the Makegrub4dos.zip file from the Download – Beta Downloads page – extract the cmd file and place it in the same folder.
4. Run a Windows Command Prompt window (e.g. Start Menu – Accessories – Command Prompt)
2. Using the Makegrub4dosISO.cmd file
1. Type ma and hit the <TAB> key to complete the command and press <ENTER> – you should see a usage prompt:
MAKE A GRUB4DOS BOOTABLE ISO FILE
=================================
Variable 1 = ISO FILENAME =
Variable 2 = SOURCE FOLDER =
Variable 3 = ISO VOLUME NAME = G4DOS
BOOTFILE = grldr (grldr from “source”)
Usage: makegrub4dosiso.cmd [ISO FILENAME] [SOURCE FOLDER] [ISO VOLUME NAME]
2. To make an ISO, you need to make sure that the grldr file is present at the top level of your source folder. Now type the command (use ma <TAB> to save typing!):
makegrub4dosiso.cmd test.iso I:\ my_iso_label
where test.iso is the name of the iso that you want to create, I: is the USB drive that you want to convert to an ISO file and my_iso_label is the volume label of the ISO that you want to create.
If all your boot files are in a folder, you can specify a source folder instead of a drive letter – e.g.
makegrub4dosiso.cmd test.iso C:\myusbpen\formycd my_iso_label
Do NOT use any filenames/foldernames with spaces in them.
The script will use either OSCDIMG or MKISOFS (depending on which one you have on your system) to create a new grub4dos bootable ISO file.
Note: ‘bertrand’ from reboot.pro uses this command line to prepare an ISO file, it differs in that it has a -l parameter and no -J or -r parameters (not tested):
mkisofs -v -iso-level 4 -N -D -d -joliet-long -volid "Grldr" -A GRLDR/MKISOFS -sysid "Win32" -b grldr -no-emul-boot -boot-load-seg 0x7C0 -boot-load-size 4 -o "grldr.iso" "folder"
Use this command for a WinPE bootable ISO
set VNAME=myvol
set BOOTFILE=grldr
set ISONAME=fred.iso
set SRCFOLDER=C:\temp
mkisofs -iso-level 3 -force-uppercase -volid "%VNAME%" -b %BOOTFILE% -no-emul-boot -hide boot.catalog -o %ISONAME% %SRCFOLDER%
You may find grub4dos 0.4.6 does not work with level 4, so use level 3
3. Testing your ISO file
I would recommend that you test your new ISO file before burning a CD to save making coasters! Here are some alternatives which you can try:
1. The latest versions of RMPrepUSB (v2.1.652 and later) can boot from an ISO via the emulator QEMU under Windows – just type Ctrl-F11 or use the File menu tab to test that your new ISO works.
OR
use Qemu Manager – install this on your Windows system and create a new new virtual machine (New virtual machine – choose an OS and create a virtual hard disk so that at least one hard disk is present when the ISO file boots). Then in the Drives tab, click the CD-ROM icon and set the image name to your new ISO file. Then click the green arrow button to test your new ISO file.
2. Use RMPrepUSB to copy the new ISO file to a USB drive. Make a menu list that will load your ISO as a CD and test it using the RMPrepUSB – QEMU button. Note that this will test that you can at least get to the ISO’s grub4dos menu, but it may not run the menu entries correctly. If the ISO file is large (>4GB) you may need to use NTFS when you prepare the bootable USB drive.
title testiso
map /test.iso (0xff)
map --hook
chainloader (0xff)
or easy still, just copy your new ISO file to an Easy2Boot USB drive and boot it.
3. Install and run Oracle VM Virtual Box or some other virtual machine and load the ISO onto a virtual CD drive used by the emulator. Be aware that I have seen problems where QEMU boots from a grub4dos ISO successfully but Virtual Box does not.
4. If you have a Zalman VE200 HDD caddy, copy your new ISO file to the _ISO folder and select it as the CD boot file – then test it on a real system.
Note: I have seen grub4dos bootable ISOs which don’t boot from the ZalMan VE200 but that do boot when burnt to a Real CD and booted on a real system.
5. The acid test – burn the ISO to a CD or DVD and boot from it using a real computer!Unsupported embedUnsupported embed
4. Troubleshooting
If you are using MKISOFS, try the OSCDIMG utility instead (and vice versa). Mkisofs may have a 4GB size limitation.
The usual problems are due to the type of filesystem used for the ISO. When an OS boots, it may expect the files to have lowercase filenames or uppercase filenames. e.g. bootmgr or BOOTMGR. If it looks like some files are not being detected by the booting OS, this may be the reason. Try Googling for someone with similar problems to see if you can modify the makegrub4dos.cmd file by changing some of the switches on the command line.
If you are having trouble getting your grub4dos menu to work when a menu option is selected (grub4dos reports an error due to a ‘bad’ command), this is probably due to the fact that it is now booting as a CD rather than a ‘hard disk’ device. Here are some points to watch:
1. When booting from CD there may only be one hard disk (the system’s internal hard disk) in the system. So any reference to (hd1) in a menu will cause an error.
2. Try to avoid booting from a mapped image using chainloader (xxxx)+1 (where xxxx is whatever you have mapped it to) – instead specify the actual boot file such as chainloader ()/io.sys or chainloader ()/bootmgr or chainloader ()/ntldr
3. Check filenames are not case sensitive – e.g. if chainloader /bootmgr does not seem to work try chainloader /bootmgr || chainloader /BOOTMGR so that it will work whether it is lower case or uppercase.
4. If you have excluded CDROM drives from a find command then it obviously won’t find the file on the CD! For example, don’t use find –set-root –devices=h /bootmgr .
5. Use find –set-root xxxx to set the root device, this way it will work on a USB drive or on a CD.
6. There could be more than one CD device present in a system, the boot CD may not always be (cd0).
Tip: use (bd) to reference the boot device disk and that will work for both USB drives and CD/DVDs.
Here is an example of a menu that loads a DOS hard disk image file and boots it as a hard disk. Note how io.sys is specifically loaded instead of just ()+1 being used.
title HDDREG.img\nMS-DOS hard disk image file
map --mem /hddreg.img (hd0) || map /hddreg.img (hd0)
map --hook
#look for a file inside the image and set device as the root device
find --set-root /hddreg.cab
#load and boot using DOS bootloader
chainloader ()/io.sys
MAKE A LARGE DOS-BOOTABLE CD WITHOUT NEEDING CD DRIVERS!
Booting from a CD or DVD to DOS is a problem these days as most PCs have modern SATA drives and the old DOS CD-ROM drivers are often not compatible.
Do you want to make a CD which boots to DOS (MS-DOS or FreeDOS) as A: but has access to all files on the CD without needing any CD drivers?
Using the method below, you can make a bootable CD which will boot to a grub4dos menu (which can be made invisible to the user). You can then run MS-DOS or FreeDOS and boot to DOS. Once at the DOS command prompt (A:) you will have the entire contents of the CD on the virtual A: drive. Drive A: can be 500MB or more! You do not need to load CD drivers in order to access all the CD contents as the contents will be on the A: drive.
The only problem with this method is that you cannot have more than 1000’s of files in any one folder (and cannot have lots of large deep sub-folders). It does not work with an XP CD (/I386 folder), for instance, as this has 1000’s of files in one folder – however it should work with most ordinary DOS folder structures.
How it works
When you boot from a CD it can be booted as a floppy or a hard disk or as neither. The Makegrub4dos.cmd script uses a switch with mkisofs of –no-emul-boot so that the BIOS does not emulate either a floppy disk or a hard disk when booting the CD. If we used floppy-disk emulation then we could only access 2.8MB within a floppy disk image. We could use a hard disk image but that might confuse DOS when it boots, as the CD will appear as hd0 (but write-protected). Instead of using a hard disk or floppy disk image, we specify the grub4dos bootloader file grldr and specify ‘no emulation’ when we create the ISO. The ‘El Torito’ BIOS specification has more details.
When we boot from a cd with no emulation, the operating system that is loaded must use it’s own drivers to access the CD/DVD. However, grub4dos can access the CD as it understands the CD filesystem which has a CDFS (non-FAT, non-NTFS) filesystem with 800h long sectors. Once grub4dos has been loaded, we call copycd.bat. This is a grub4dos batch file which makes a large (500MB+) ram drive and then copies the contents of the cd to the virtual ram drive (fd0), folder by folder. We can then boot to DOS from the files that are now on the virtual fd0 drive. The internal Hard Disk 0 will still be hd0 in DOS so we can fdisk it or format it and copy files to it.
Requirements
- Install RMPrepUSB
- Download Makegrub4dos.zip file and extract the makegrub4dos.cmd file to a new folder on your hard disk
- Download mkisofs.exe and copy it to the same folder
- Download the grubutils zip file and extract the fat utility
Use latest RMPrepUSB to install the latest grub4dos version. Old versions of grub4dos (2011 and before) will not work!
Method
- Prepare a USB drive with the contents that you want your CD to have – in this case it will be some DOS systems files plus any other files that you require.
- Install grub4dos to the USB drive using the ‘Install grub4dos’ button on RMPrepUSB
- Copy the grubutils file ‘fat‘ to the root of the USB drive.
- Cut and paste the text below to make a new file called copycd.bat on the root of the USB drive.
- Edit the menu.lst file on the USB drive (press F4 in RMPrepUSB to load it into Notepad) – copy the menu items below into it and save the file to the USB drive. If you are using MS-DOS you can delete the FreeDOS menu’s – if you are using FreeDOS you can delete the MS-DOS menus.
# Display CD contents
ls (cd)/
title MS-DOS BOOT WITH CD contents on FD0
# call the copy batch file - first parameter is either (fd0) or (fd1) - next parameter is size of virtual drive (0x100000=512MiB)
call (bd)/copycd.bat (fd0) 0x100000
# set number of floppies seen by BIOS - must be 2 if using (fd1) instead of (fd0)
map --floppies=1
root (fd0)
chainloader /io.sys

title FREE-DOS BOOT WITH CD contents on FD0
# call the copy batch file - first parameter is either (fd0) or (fd1) - next parameter is size of virtual drive (0x100000=512MiB)
call (bd)/copycd.bat (fd0) 0x100000
# set number of floppies seen by BIOS - must be 2 if using (fd1) instead of (fd0)
map --floppies=1
root (fd0)
chainloader /kernel.sys
title ---- TEST ENTRIES ---
root ()

title TEST FREE-DOS BOOT AS FD0
map (hd0,0)+1 (fd0)
map (hd0) (hd1)
map (hd1) (hd0)
map --floppies=1
map --hook
root (fd0)
chainloader /kernel.sys

title MS-DOS BOOT AS FD0
map (hd0,0)+1 (fd0)
map (hd0) (hd1)
map (hd1) (hd0)
map --floppies=1
map --hook
root (fd0)
chainloader /io.sys
6. Test the USB drive by using the QEMU button (or just press F11) in RMPrepUSB. Use the TEST ENTRIES menu options to check that your files boot to DOS as A: and your DOS utilities run correctly. Note: the first entry which uses copycd.bat will not work correctly at this stage!
7. Now make an ISO file using the Makegrub4dos.cmd method described at the top of this article – e.g. makegrub4dos new.iso J:\ TESTCD where J: is your USB drive letter.
8. Use the latest version of RMPrepUSB and hit Ctrl-F11 and then select your ISO. If your CD requires that a hard disk should be present, you will also have to create a virtual hard disk when prompted.
9. ‘Rinse and Repeat’ until you are happy that it appears to be working as expected.
10. Finally delete the TEST ENTRIES from the menu.lst and change anything else you require. If you don’t want a user menu at all, just add the lines
default 0
timeout 0
to the start of the menu.
Note that the size of the virtual floppy that is created is set by the line call (bd)/copycd.bat (fd0) 0x100000 where (fd0) is the device ID and 0x100000 is the size of the virtual floppy (0x100000 = 512MB) – this must be at least as big as the CD files so you should increase this if your CD is bigger than 500MB or decrease it if the CD is smaller.
There is a 3 second delay in copycd.bat – you can reduce or remove this (see pause –wait=3 line)
Now create the ISO file again using Makegrub4dos.cmd, test it in QEMU Manager and if OK, burn it to a CD ready for testing.
Troubleshooting
- If grub4dos cannot access the CD, try the cdrom –init command in each menu (or at the top of the menu).
- if you use a ZalMan VE-200 CD emulator to test your ISO – beware! This does not seem to work with grldr ISO files. However, real CDs do work. I would therefore recommend testing using a software emulator such as QEMU Manager or Oracle Virtual Box and then burning a real CD.
- If you see an error message ‘FAT error: the physical drive cannot work!‘ then your system does not have enough memory (RAM). if you are using a virtual machine then increase the amount of memory available (but not above 1100MB), if you are booting on a real system, check if the size of the virtual drive that you have prescribed in the menu.lst (e.g. 0x100000) can be reduced (i.e. matches the size of all files on the CD).
copycd.bat contents (last updated 2012-02-19 – bugfix now use %FD%%%cd%) – (Remove # from red line below if you want to see the files listed as they are copied)
!BAT
debug off
errorcheck off
# stop 'hit Q to continue' messages
pager off
#512MB = 0x100000
#850MB = 0x1A0000
#1GB = 0x200000
set FD=%1
map --mem (md)0x300+%2 %FD%
map --hook
debug 1
clear
echo Copy CD contents to virtual drive %1 size=%2
# load fat utility as a module for quick operation
insmod (bd)/fat
fat mkfs %FD%
debug -1
pause --wait=3
debug off
root (cd)
set cd=
call :cpa
echo Finished!
goto :eof

:cpa
clear
echo Copying files in folder: %cd%
::Change source root
root (cd)%cd%/
ls | call :copyfiles
echo Finished folder %cd%
goto :eof

:copyfiles
if "%1"=="" goto :eof
::If is a directory
cat --length=0 /%1 || goto :sub-dir
::copy file
#echo %cd%/%1
fat copy /%1 %FD%%%cd%/ > nul || echo Error: %cd%/%1
shift
goto :copyfiles

:sub-dir
setlocal
fat mkdir %FD%%%cd%/%1
set cd=%cd%/%1
call :cpa
endlocal
shift
goto :copyfiles
HIRENS BOOT CD
The Hirens Boot CD contains a Make ISO batch file which uses the following command to create an HBCD ISO called MyHBCD.ISO which has a grub4dos boot loader…
mkisofs.exe -R -D -J -l -joliet-long -duplicates-once -o MyHBCD.iso -b HBCD/grldr -c HBCD/boot.cat -hide-joliet HBCD/boot.cat -hide HBCD/boot.cat -no-emul-boot -N -boot-info-table -V HirensBootCD -boot-load-size 4 CD
UDF AND FLOPPY EMULATION ISOS
There are different types of CD boot emulation, including floppy emulation – in which the boot sector of the CD is a bootable floppy disk image. The boot sector is not accessible when viewing the CD in a file manager such as Windows Explorer and might appear to be a blank disk if no files are contained on the disc root. These ISOs can be mounted as a virtual CD/DVD and most modern applications (Virtual CloneDrive or ImDisk) will allows access to all files in the UDF volume,
You may come across an ISO that is in UDF format (a newer standard intended to replace ISO9660). When grub4dos maps this to a drive, all it may see just a single README.TXT file containing the text:
“This disk contains a “UDF” file system and requires an operating system that supports the ISO-13346 “UDF” file system specification.”
grub4dos 0.4.5c cannot read the UDF file system (but 0.4.6a can!), however you can still boot from a UDF ISO file using grub4dos as follows:
title Boot from Floppy Emulation ISO
map /my.iso (0xff)
map --hook
root (0xff)
chainloader (0xff)