
Table of Contents
You can make an Easy2Boot multiboot USB drive – just rename the ISO to .isowinv and add it!
For full Hirens functionality (DOS apps, etc.), convert the ISO to a FAT32 .imgPTN file.
See also Tutorial 29 – boot Hiren’s v15.2 from ISO
For booting Hirens 9.5 (DOS-based Hirens ISOs) see Tutorial 116 – for Hirens 9.7 and later, use the method below.
Hiren’s Boot CD (HBCD) is a heavily modified and illegal version of Microsoft Windows XP. However, it is very prevalent on the internet and the ISO file can be easily downloaded. If you have a licence to run Windows XP on your computer (e.g. if your computer has a Windows XP, Windows Vista Business or Ultimate or Windows 7 Professional or Ultimate Certificate Of Authenticity label on it) then you can legally run XP (but only on that computer – but not dual boot!).
Hiren’s Boot CD 13.2 and later versions even includes RMPrepUSB v2.1.620, even though no permission was asked and the software is copyrighted and distribution is forbidden!
This tutorial describes how you can make any USB Flash memory drive (aka pen drive or thumb drive or UFD) or USB hard drive into a bootable drive that will boot and run Hiren’s Boot CD.
For more information on which utilities are contained on HBCD please visit the HBCD web site here.
New eBook on grub4dos is now available. Over 170 pages.
See Easy2Boot for instructions on making a simple MultiBoot USB drive quickly and easily – then add the Hirens ISO and rename the file extension to .isowinvh!
STEP 1 – DOWNLOAD HIREN’S BOOT CD
- Download the ZIP file for HBCD (e.g. v15.2) from here. Click on the download link for the ZIP file (located 3/4 of the way down the page)
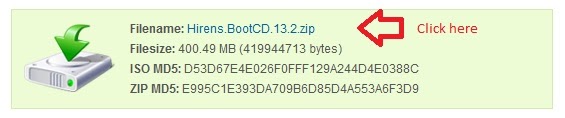
- The file is currently called Hirens.BootCD.15.1.zip and is 498MB in size – check the file size is correct after you have downloaded it!
- Version 2.1.630 or later of RMPrepUSB can extract the contents of an ISO directly. Just set the name of the ISO in box 5 Copy Files of RMPrepUSB (see Fig 3 below).
- – OR –
- Extract the contents of the ZIP file using 7Zip or your favourite unzip program. You should now have a file called Hiren’s.BootCD.15.1.iso.
- You can Mount the ISO file using the free software SlySoft Virtual CloneDrive from here or use any other ISO extraction/mounting tool you may already have (if you already have burnt a CD then you can use the CD instead of mounting the image) – you should now see in Windows Explorer the contents of the ISO file…
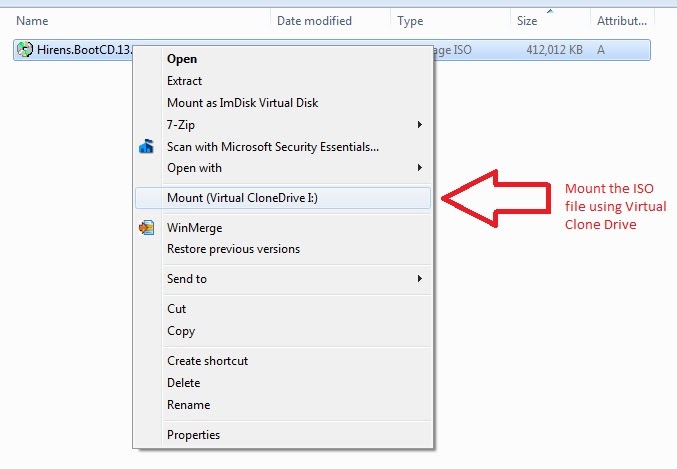
Fig. 1 Right-click on the ISO file and select the Mount (Virtual CloneDrive) entry.
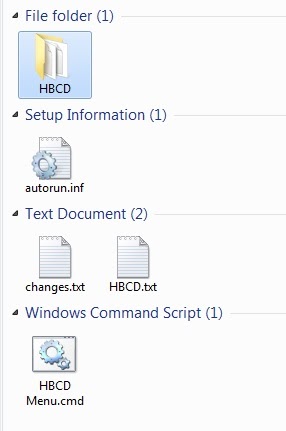
Fig. 2 Contents of the Virtual drive that you have mounted the ISO file onto (note the HBCD folder).
STEP 2 – FORMAT AND PREPARE YOUR USB DRIVE
The next step will make a bootable USB drive and then copy the files from the HBCD to the USB drive. You will need a 512MB or larger USB Flash memory drive or USB Hard disk. Download and install RMPrepUSB from this website. Use RMPrepUSB to wipe it and make partition of 512MB or more using these RMPrepUSB settings 1-5 :
1 – MAX
2 – HIRENS (or any name you like)
3 – XP
4 – FAT16 + Boot as HDD (or FAT32 + Boot as HDD if the drive is over 2GB) – if you need to use NTFS, most of the DOS utilities will not work unless you load the NTFS DOS driver (see below for details).!
5 – Tick the Copy OS Files box and select the drive letter of your mounted Virtual HBCD drive (do not tick the BartPE checkbox) – OR pick the ISO file that you downloaded if you have not mounted the ISO file previously.
6 – click Prepare Drive
Follow the prompts.
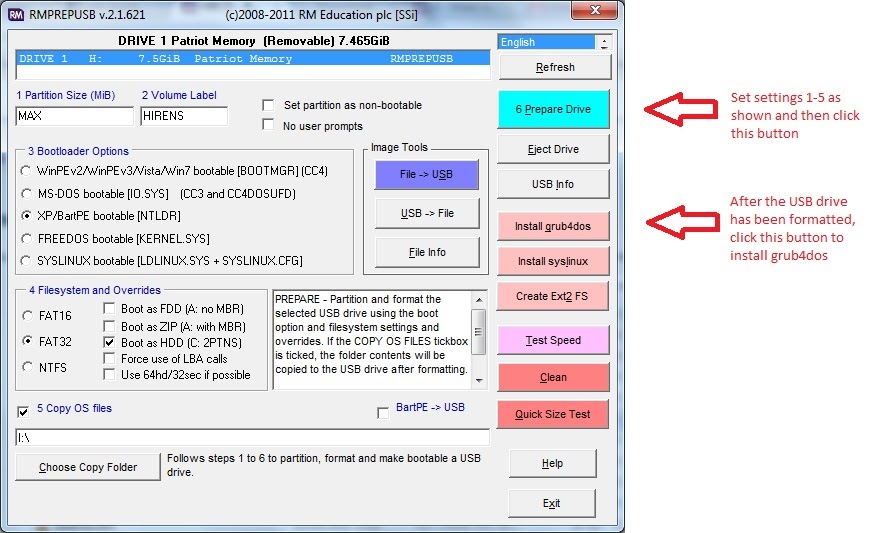
Fig. 3 Note: In later versions of RMPrepUSB you can specify the name of the ISO file as the 5 Copy Files path
e.g. set the path to C:\temp\Hiren’s-Boot-CD.15.1.ISO
STEP 3 – INSTALL GRUB4DOS BOOT LOADER
Click on the RMPrepUSB – Install grub4dos button to install grub4dos, choose ‘Yes’ for the MBR option and press the ENTER key when prompted and allow it to copy over the grldr file to the USB drive.
Step 4 – Copy the menu.lst file
Grub4dos needs to have a menu file. Copy the menu.lst file which is now located in the HBCD folder of the USB drive to the root of the USB (top level).
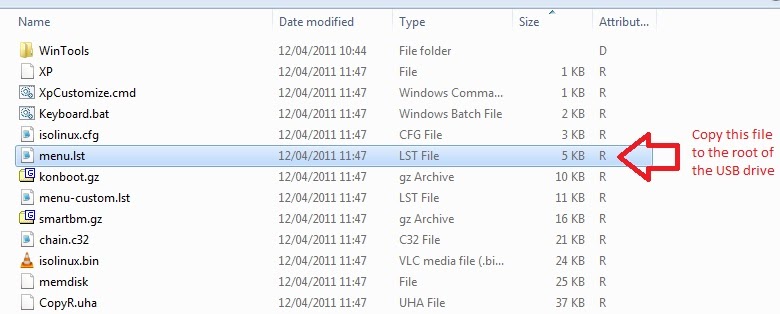
Your USB drive contents should be as shown below and contain 6 files and one HBCD folder (actually the only files needed are the grldr and menu.lst file and the whole HBCD folder – you can delete the other 4 files):

Tip: If you don’t want to replace an existing menu.lst file, simply add the entry below to your existing grub4dos menu.lst file
- title Boot Hirens Boot CD
- configfile /HBCD/menu.lst
TESTING YOU USB DRIVE
To test it, you can press the F11 key whilst running RMPrepUSB – this will launch a QEMU emulation session (it will not harm your Windows system). You should see the grub4dos menu as shown below appear in a QEMU window. Test an HBCD menu option (e.g. Mini Windows XP) to see if it boots correctly (Note: if it crashes QEMU the first time, try F11 again as it sometimes works a 2nd time for some strange reason!). Click inside the QEMU window to interact with Mini XP (it may be slow to react as the whole XP OS is emulated) and when you have finished press the two CTRL+ALT keys on the keyboard to exit the emulator. You can quit/close the emulator by clicking on the Windows X icon at the top right of the window. You may find that the mouse/keyboard does not work in QEMU if you try some other menu items (e.g. Mini Linux).
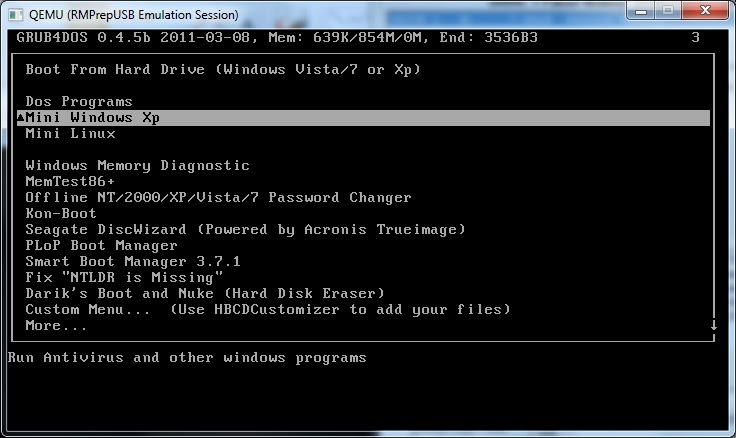
You should see this menu – select the Mini Windows Xp menu item and press ENTER
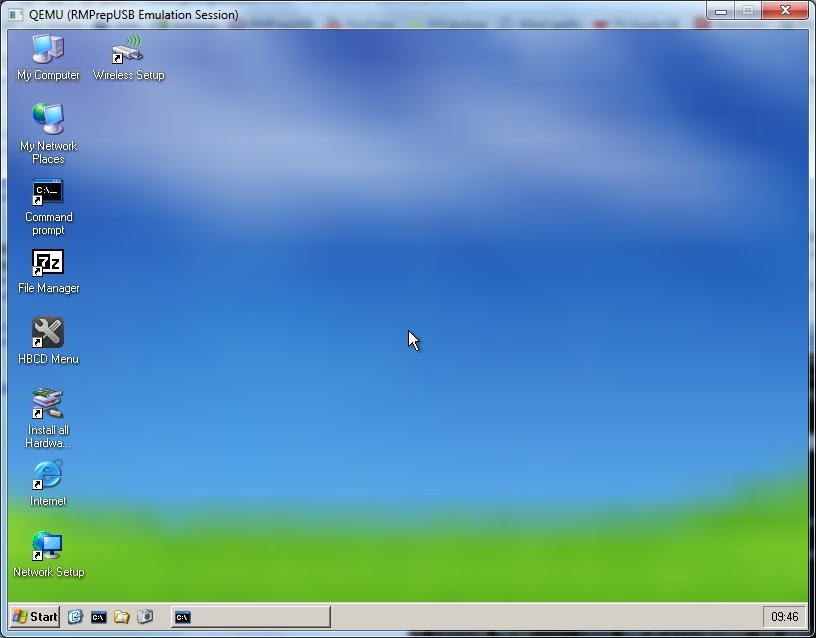
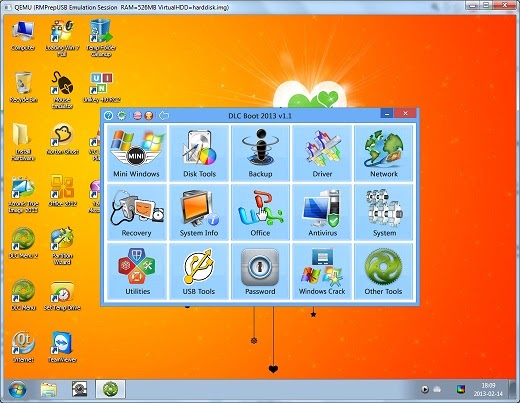
The HBCD XP Desktop (booted inside Windows 7 64-bit OS using the RMPrepUSB QEMU F11 function)
Now go try it for real on a real system. You may need to set your BIOS boot order so that it will boot from a USB drive before it’s hard disk. Do not unplug the USB drive whilst XP is running or some functions may not work.
If the USB mouse and keyboard do not work, make sure you use a USB 2 port. If the chipset is new, you may need to connect PS/2 input peripherals! Also make sure the BIOS USB settings are configured for Legacy compatibility.
USING HBCD DOS UTILITIES
If you have an NTFS USB drive, then some DOS utilities will not work because DOS cannot understand the NTFS filesystem and thus cannot see the \HBCD folder and files. To fix this, when most of the DOS utilities run, you will be prompted with a DOS driver list:
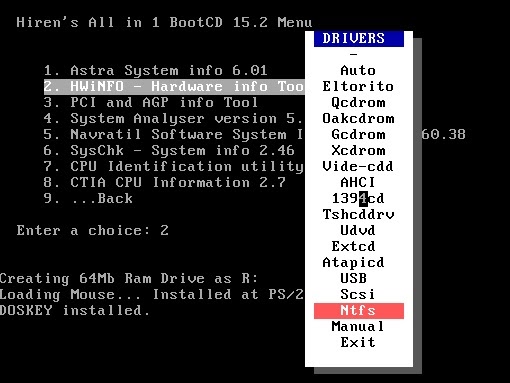
Pick the NTFS driver so that DOS can access the \HBCD folder on the NTFS drive.
USING HBCD MINI XP
To set up networking, click on the Network Setup desktop icon.
For wireless connectivity, first run Install all Hardware (HWPnP) and then run the Wireless Setup link.
You can then run Opera by clicking on the blue Internet icon on the desktop.
Click on the HBCD Menu icon to install and run more software from the WinTools folder, including RMPrepUSB!
Click on the EN icon in the system tray to change keyboard layout.
TROUBLESHOOTING
If you only see a few icons on the MiniXP desktop, then you have not copied the \HBCD folder over to the USB drive correctly. Check that the USB drive has an \HBCD folder as shown in the second screenshot in Step 4 above.
HIRENS BOOT CD 15.1 DLC VERSION (WITH MINI WINDOWS 7)
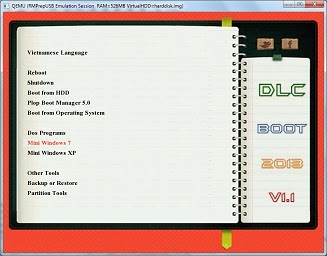
DLC 2013 booted using RMPrepUSB – Test using QEMU button
This download can also be installed in a similar way to that described above:
1. Format and prepare a grub4dos USB drive as in Step 2 above
2. Install grub4dos as in Step 3 above
3. Extract the contents of the ISO to the USB drive (copy all files and folders)
4. Copy the \DLC1\menu.lst file to the root folder of the USB drive (or add a configfile /dlc1/menu.lst entry to your existing grub4dos menu.lst file)
5. To fix a bug in 15.1 DLC version 2 where it does not find the DLC1 folder when running Old Dos apps, overwrite the file at \DLC1\DOS\OLDDOSUSB.GZ with this one.
If you are using the DLC download DLC.Boot.2013.v1.0.iso from http://dlcboot.webuda.com/ then use this menu:
- title Hirens 2013 DLC1 via grub4dos
- configfile /dlc1/menu/menu.lst